> For the complete documentation index, see [llms.txt](https://docs.luciq.ai/llms.txt). Markdown versions of documentation pages are available by appending `.md` to page URLs; this page is available as [Markdown](https://docs.luciq.ai/ios/setup-luciq-for-ios/custom-settings/sdk-customization/ui-color-and-theme.md).
# UI Color & Theme
Set the Luciq SDK to a light or dark theme in your iOS app, then match your brand with a primary color, custom fonts, and background colors.
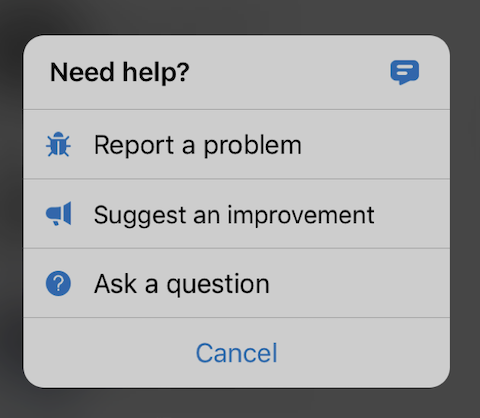
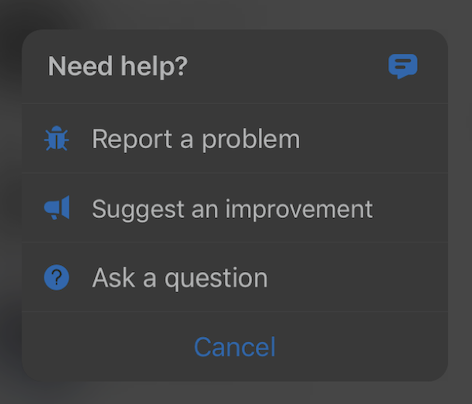
### SDK Themes
The SDK UI has two color themes: light and dark.
You can set which theme to use with the following method.
{% tabs %}
{% tab title="Swift" %}
{% code overflow="wrap" %}
```swift
Luciq.setColorTheme(.dark)
```
{% endcode %}
{% endtab %}
{% tab title="Objective-C" %}
{% code overflow="wrap" %}
```objectivec
[Luciq setColorTheme:LCQColorThemeDark];
```
{% endcode %}
{% endtab %}
{% endtabs %}
#### Primary Color, Fonts, and Backgrounds
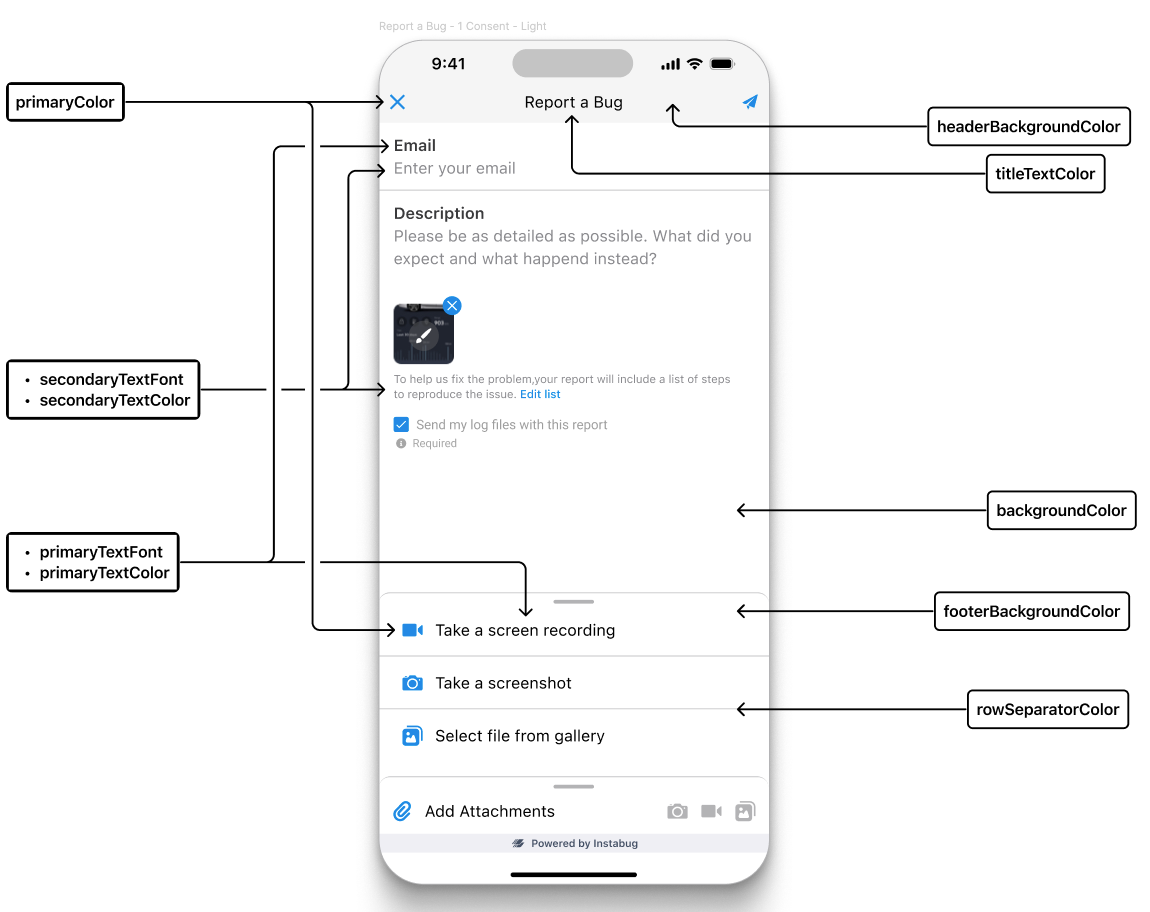
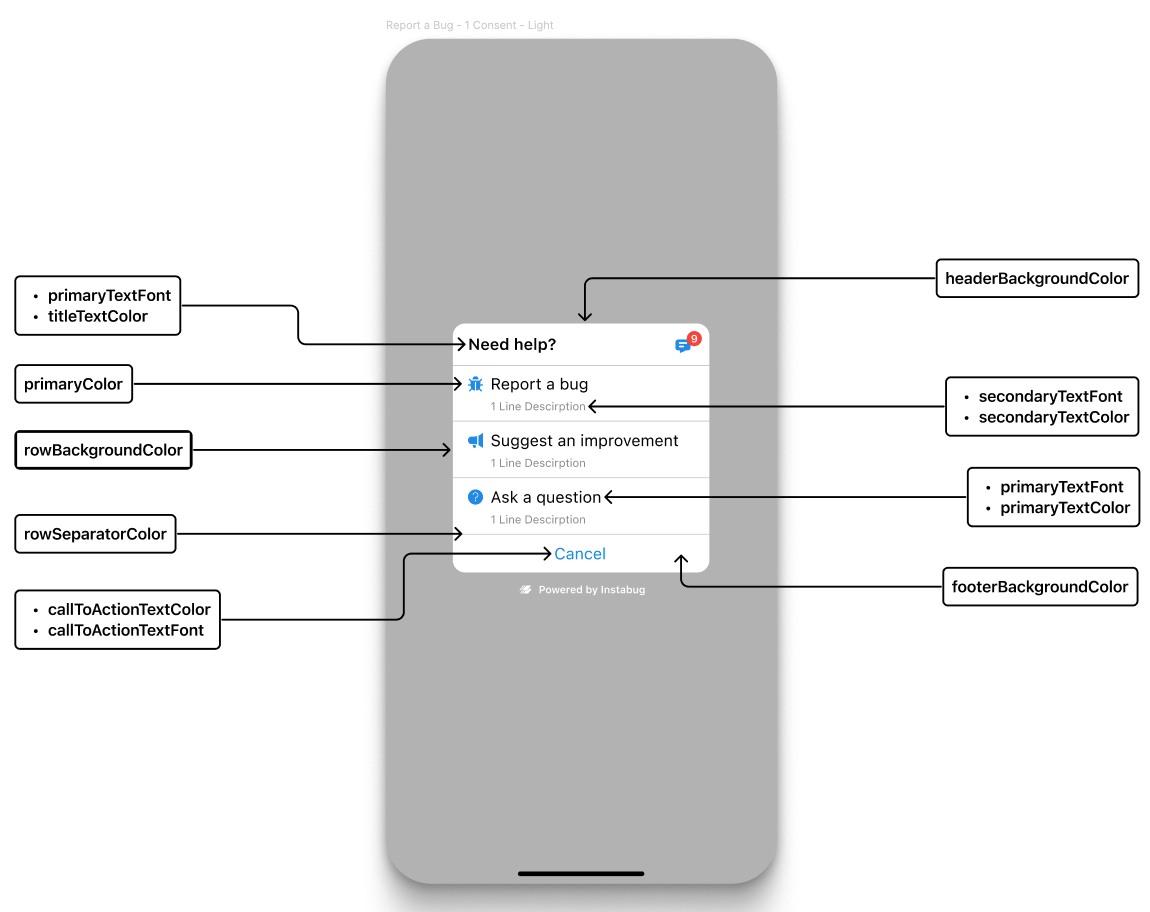
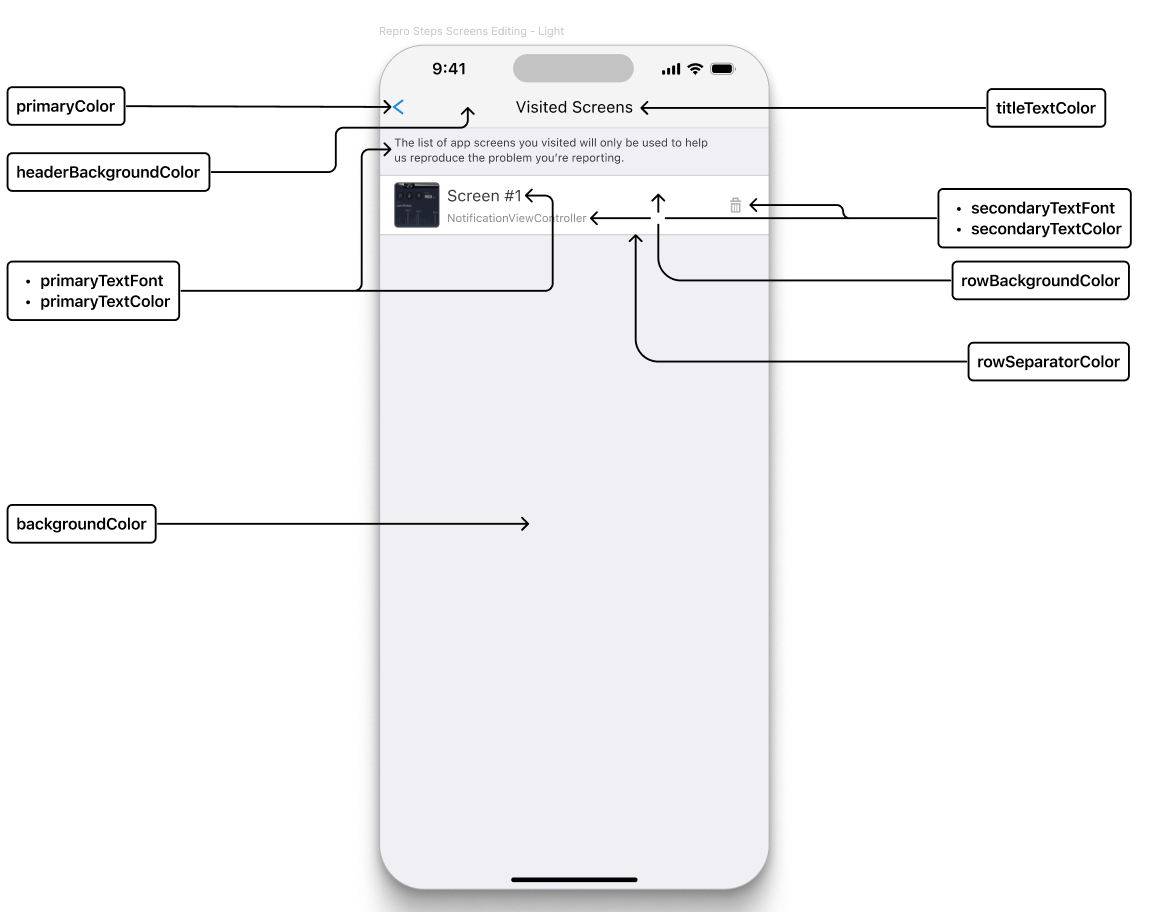
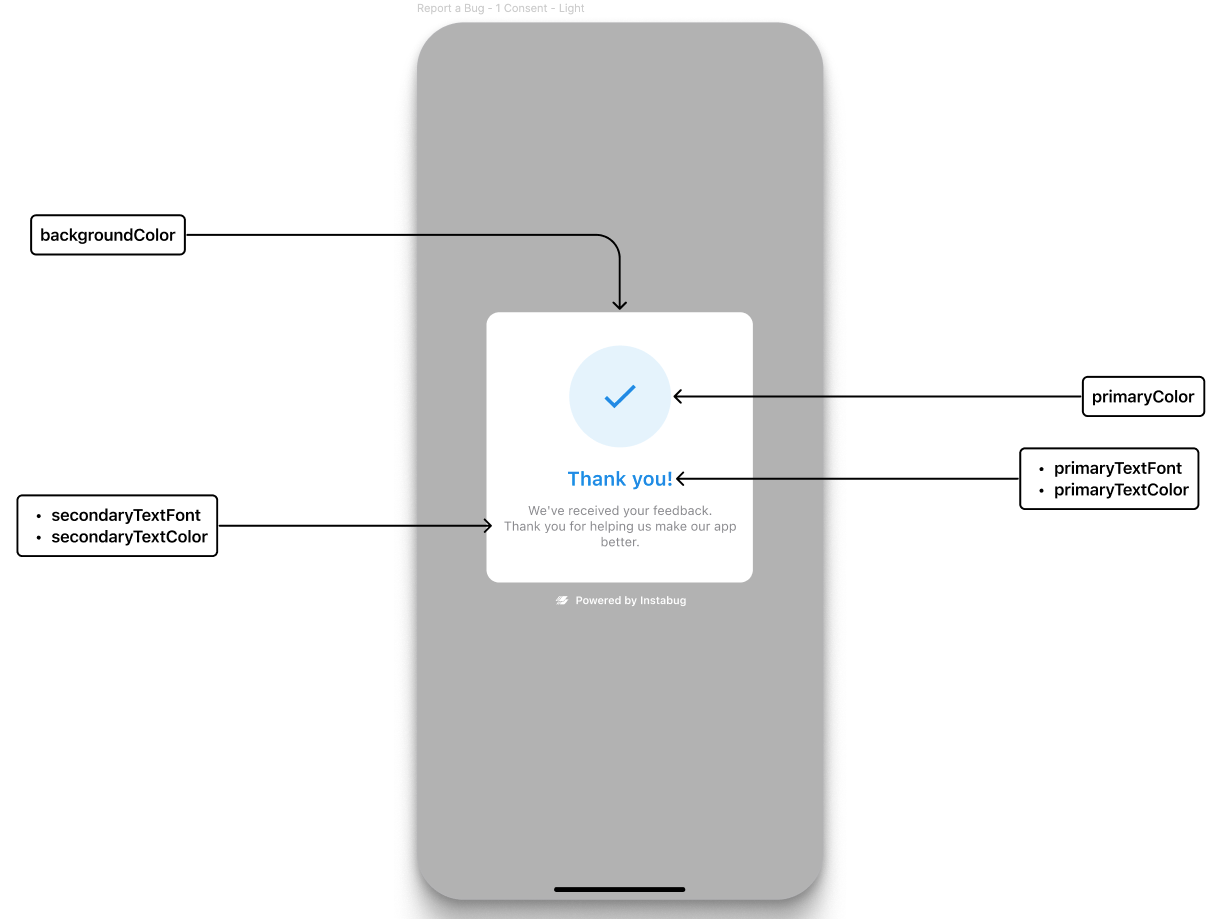
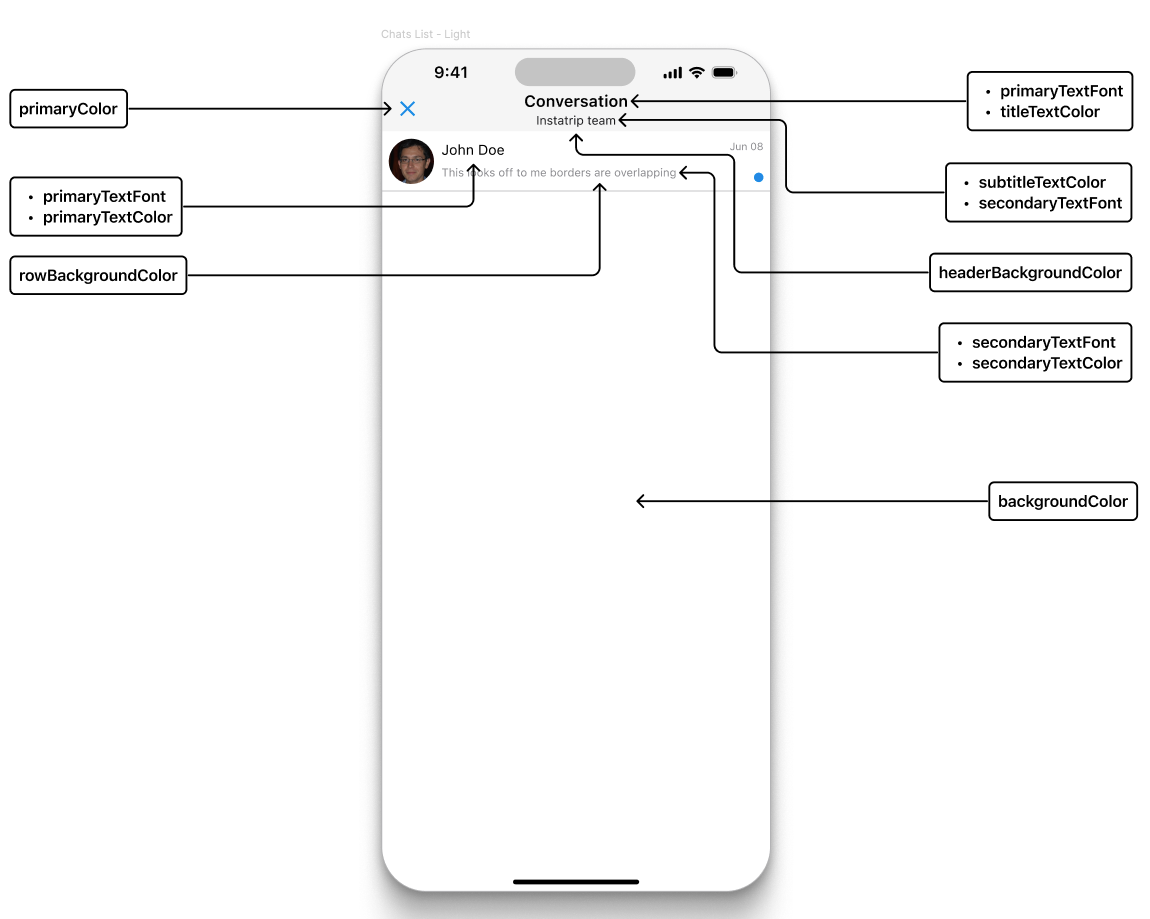
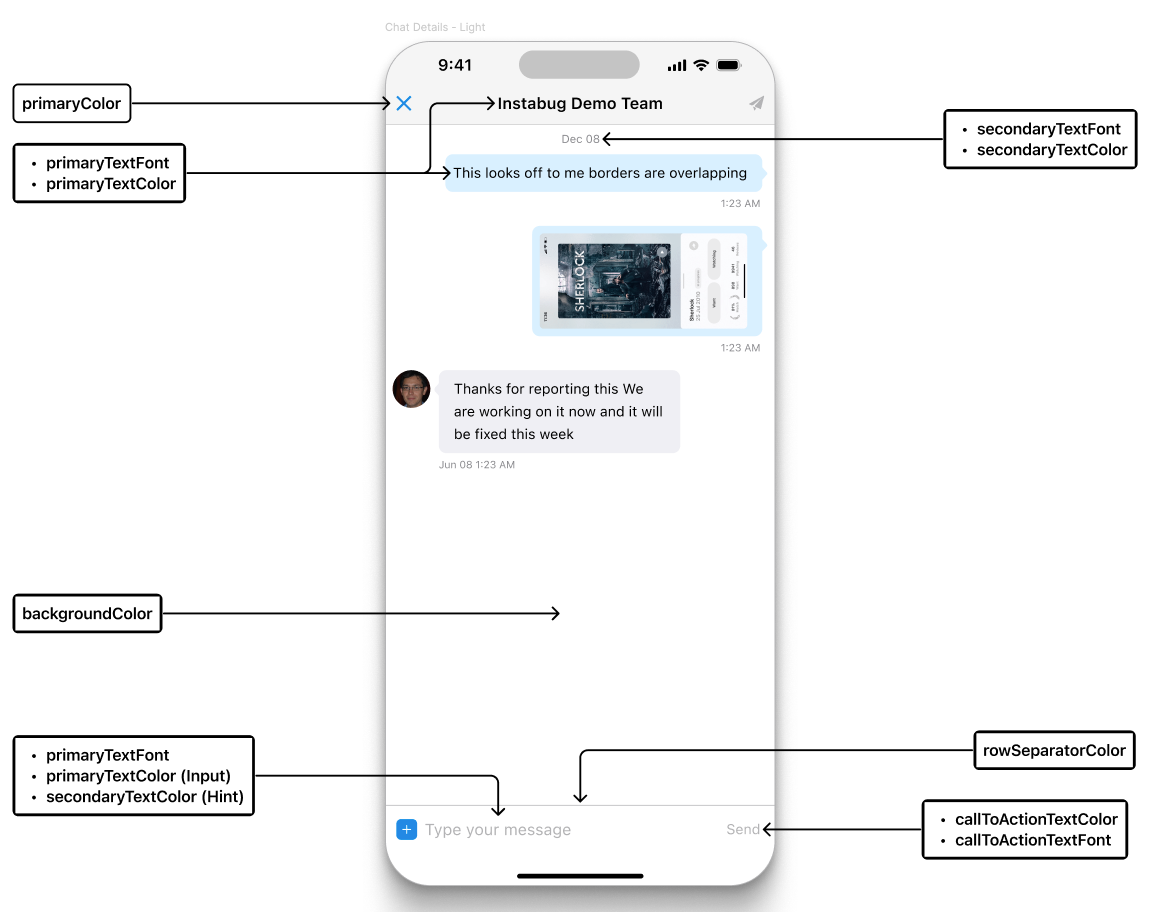
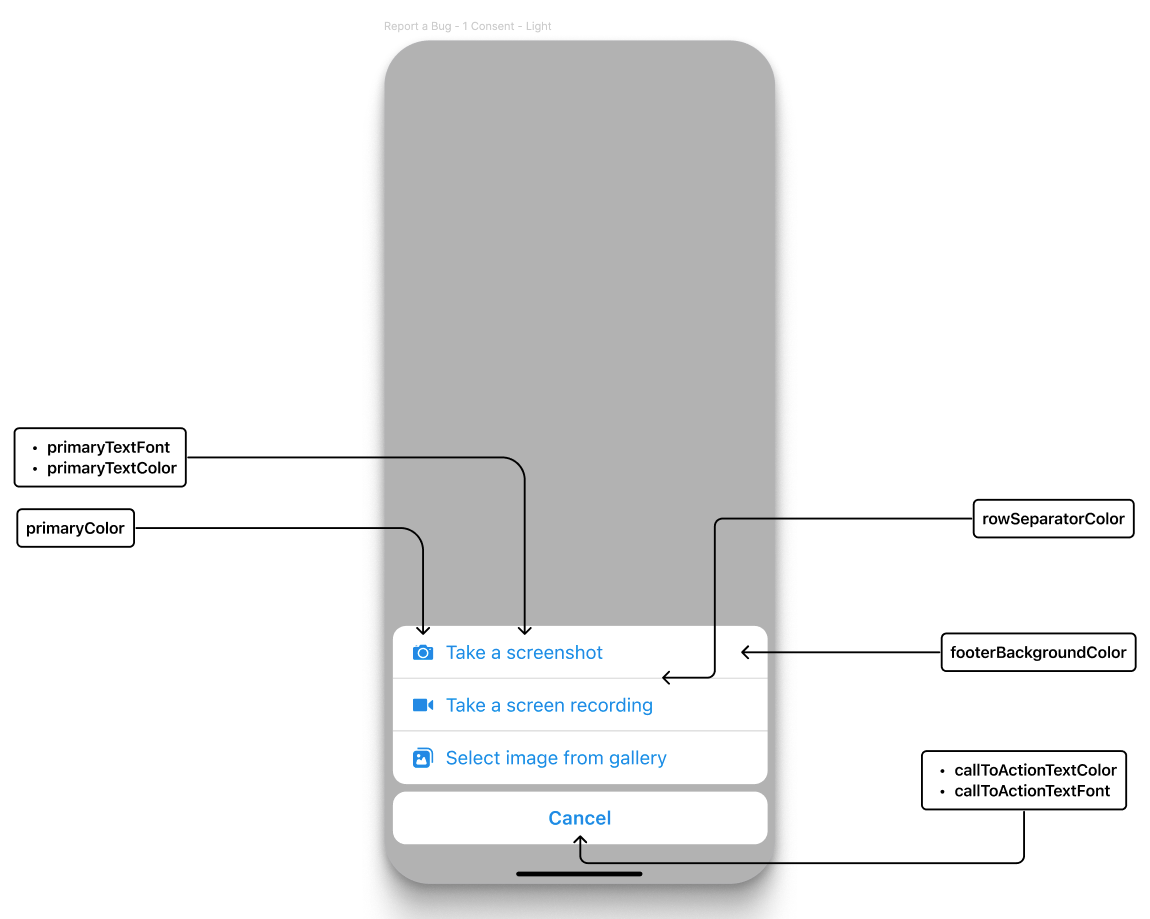
You can also further customize the SDK to match your brand’s design and identity by utilizing the API below. This API offers to set the color of UI elements that indicate interactivity, Font color, types and styles, background color, and call-to-action colors.
{% tabs %}
{% tab title="Swift" %}
{% code overflow="wrap" %}
```swift
let theme = Theme()
theme.primaryColor = UIColor.yellow // Color of UI elements that indicate interactivity (Links, or Call To Action)
theme.backgroundColor = UIColor.systemGray
theme.titleTextColor = UIColor.systemGreen
theme.subtitleTextColor = UIColor.systemCyan
theme.primaryTextColor = UIColor.systemBlue
theme.secondaryTextColor = UIColor.blue
theme.callToActionTextColor = UIColor.cyan
theme.headerBackgroundColor = UIColor.systemBrown
theme.footerBackgroundColor = UIColor.systemTeal
theme.rowBackgroundColor = UIColor.systemPink
theme.selectedRowBackgroundColor = UIColor.systemBrown
let menlo = UIFont(name: "menlo", size: 10)!
theme.primaryTextFont = menlo
theme.secondaryTextFont = menlo
theme.callToActionTextFont = menlo
theme.rowSeparatorColor = UIColor.systemGreen
Luciq.theme = theme
```
{% endcode %}
{% endtab %}
{% tab title="Objective-C" %}
{% code overflow="wrap" %}
```objectivec
LCQTheme *theme = [[LCQTheme alloc] init];
theme.primaryColor = UIColor.yellowColor; // Color of UI elements that indicate interactivity (Links, or Call To Action)
theme.backgroundColor = UIColor.systemGrayColor;
theme.titleTextColor = UIColor.systemGreenColor;
theme.subtitleTextColor = UIColor.systemCyanColor;
theme.primaryTextColor = UIColor.systemBlueColor;
theme.secondaryTextColor = UIColor.blueColor;
theme.callToActionTextColor = UIColor.cyanColor;
theme.headerBackgroundColor = UIColor.systemBrownColor;
theme.footerBackgroundColor = UIColor.systemTealColor;
theme.rowBackgroundColor = UIColor.systemPinkColor;
theme.selectedRowBackgroundColor = UIColor.systemBrownColor;
UIFont *menlo = [UIFont fontWithName:@"menlo" size:10];
theme.primaryTextFont = menlo;
theme.secondaryTextFont = menlo;
theme.callToActionTextFont = menlo;
theme.rowSeparatorColor = UIColor.systemGreenColor;
Luciq.theme = theme;
```
{% endcode %}
{% endtab %}
{% endtabs %}
#### Parameters Mapping
| Report Description | Prompt Menu | Visited Screens | Thank You Message | Chats List | Chats Messages | Attachments |
| --------------------------------------------------------------------------------------------------------------------- | ------------------------------------------------------------------------------------------------------------------------ | -------------------------------------------------------------------------------------------------------------------------------- | ------------------------------------------------------------------------------------------------------------------------------------ | ---------------------------------------------------------------------------------------------------------------------- | ------------------------------------------------------------------------------------------------------------------------------ | ------------------------------------------------------------------------------------------------------------------------ |
|  |  |  |  |  |  |  |
#### Floating Button Position
If your [invocation event](/ios/setup-luciq-for-ios/setup-bug-reporting/showing-luciq.md) is a floating button, you can set its position in your app. The `CGRectMaxXEdge` will add the button to the right edge of the screen. The `CGRectMinXEdge` will add it to the left edge. The `TopOffset` specifies its position on the y-axis.
{% tabs %}
{% tab title="Swift" %}
{% code overflow="wrap" %}
```swift
BugReporting.floatingButtonEdge = .maxXEdge
BugReporting.floatingButtonTopOffset = 48
```
{% endcode %}
{% endtab %}
{% tab title="Objective-C" %}
{% code overflow="wrap" %}
```objectivec
LCQBugReporting.floatingButtonEdge = CGRectMaxXEdge;
LCQBugReporting.floatingButtonTopOffset = 48;
```
{% endcode %}
{% endtab %}
{% endtabs %}
#### Video Recording Button Position
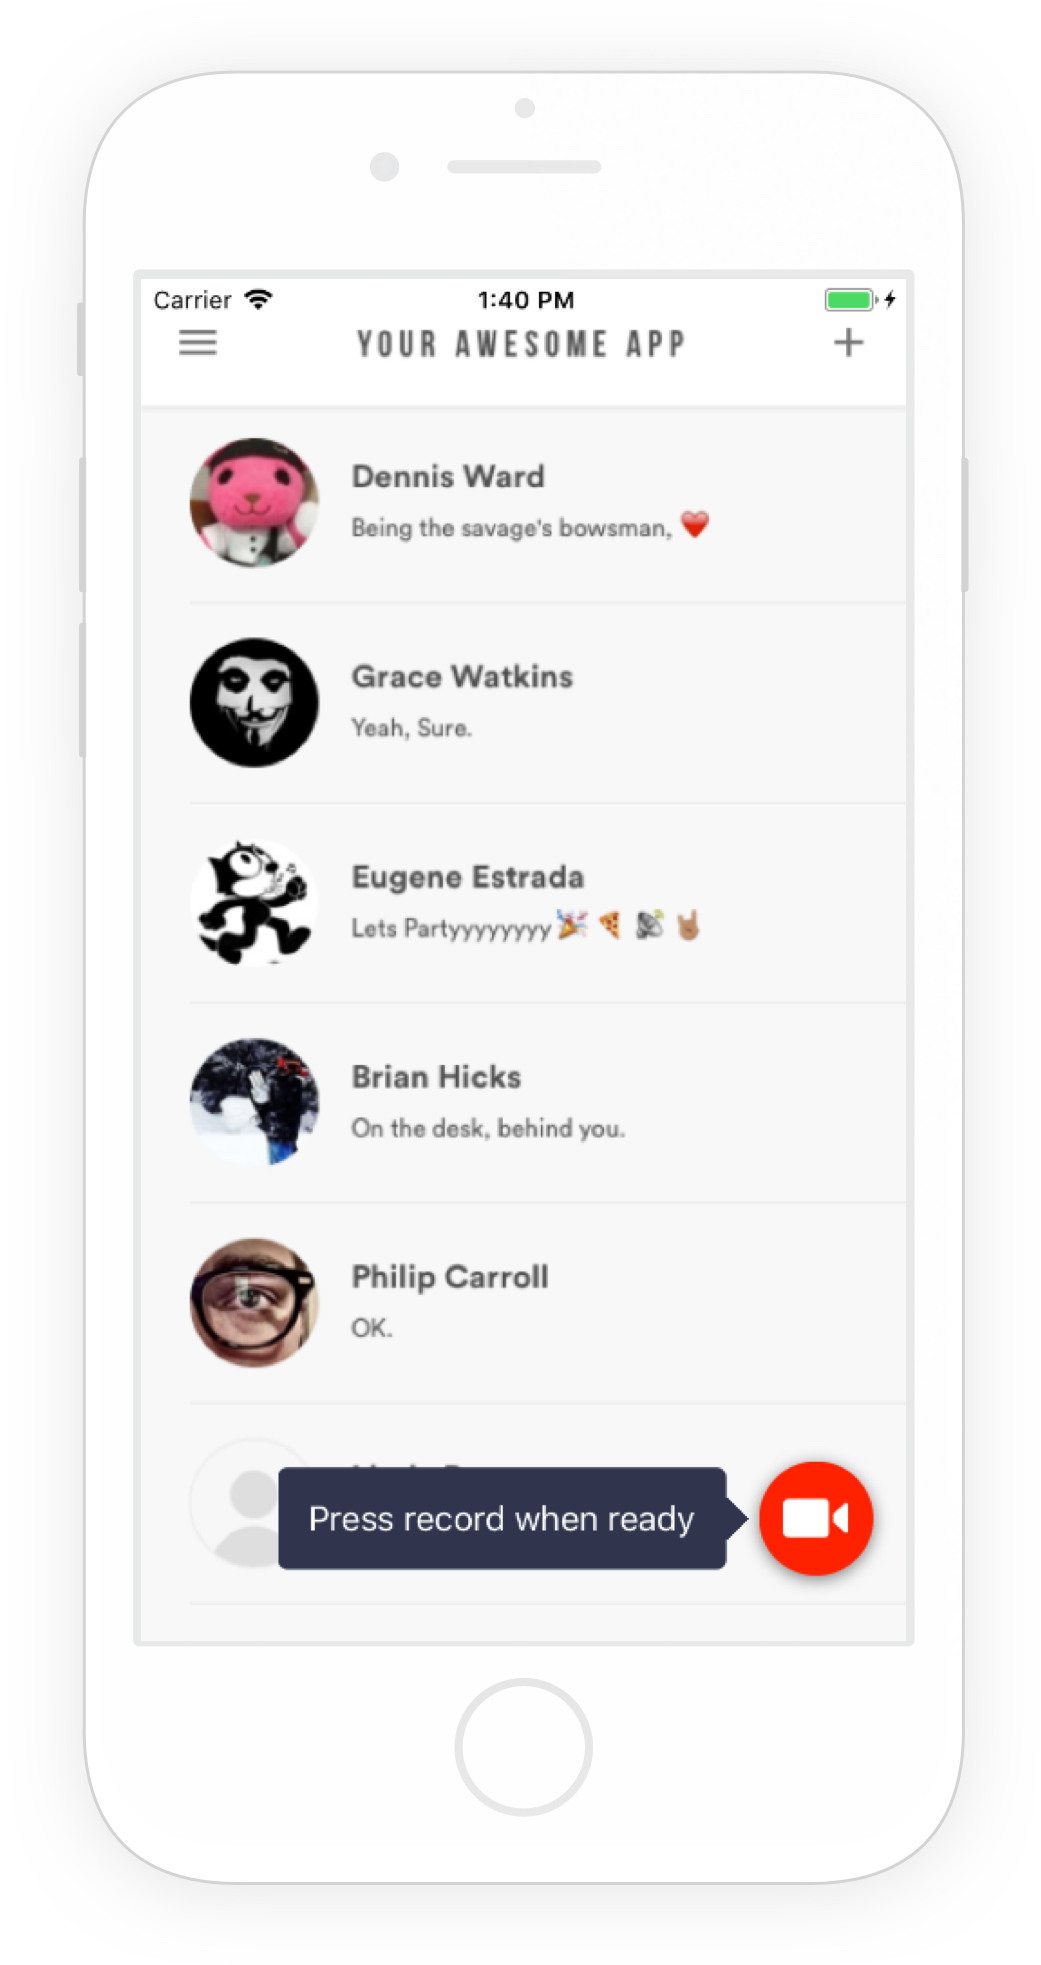
If you've enabled video recordings as attachments, you can change the position of the red recording button displayed in the screenshot below. The default position of the button is **bottom right**.
An example of the video recording button placed in the bottom right of an app.
Use this method below to set the position of the video recording button.
{% tabs %}
{% tab title="Swift" %}
{% code overflow="wrap" %}
```swift
BugReporting.videoRecordingFloatingButtonPosition = .topLeft
```
{% endcode %}
{% endtab %}
{% tab title="Objective-C" %}
{% code overflow="wrap" %}
```objectivec
LCQBugReporting.videoRecordingFloatingButtonPosition = LCQPositionTopLeft;
```
{% endcode %}
{% endtab %}
{% endtabs %}
Here are the possible values:
{% tabs %}
{% tab title="Swift" %}
{% code overflow="wrap" %}
```swift
.topLeft
.topRight
.bottomLeft
.bottomRight
```
{% endcode %}
{% endtab %}
{% tab title="Objective-C" %}
{% code overflow="wrap" %}
```objectivec
LCQPositionTopLeft
LCQPositionTopRight
LCQPositionBottomLeft
LCQPositionBottomRight
```
{% endcode %}
{% endtab %}
{% endtabs %}
---
# Agent Instructions
This documentation is published with GitBook. GitBook is the documentation platform designed so that both humans and AI agents can read, navigate, and reason over technical content effectively. Learn more at gitbook.com.
## Querying This Documentation
If you need additional information that is not directly available in this page, you can query the documentation dynamically by asking a question.
Perform an HTTP GET request on the current page URL with the `ask` query parameter, and the optional `goal` query parameter:
```
GET https://docs.luciq.ai/ios/setup-luciq-for-ios/custom-settings/sdk-customization/ui-color-and-theme.md?ask=&goal=
```
`ask` is the immediate question: it should be specific, self-contained, and written in natural language.
`goal` is optional and describes the broader end goal you are ultimately trying to accomplish on behalf of the user. GitBook uses it to tailor the answer towards what is most useful for that goal.
The response will contain a direct answer to the question and relevant excerpts and sources from the documentation.
Use this mechanism when the answer is not explicitly present in the current page, you need clarification or additional context, or you want to retrieve related documentation sections.