> For the complete documentation index, see [llms.txt](https://docs.luciq.ai/llms.txt). Markdown versions of documentation pages are available by appending `.md` to page URLs; this page is available as [Markdown](https://docs.luciq.ai/product-guides-and-integrations/product-guides/ai-features/detect-agent/visual-issues.md).
# Visual Issues
Detect visual UI issues in your mobile app automatically with Luciq's Detect Agent. Identify rendering problems, layout glitches, and visual regressions.
### Overview
**AI Visual Issues** is a feature built on top of Session Replay. Once enabled, it uses AI to scan screenshots captured during user sessions and flag visual defects such as:
* Misaligned elements or overlapping UI
* Color variations that don’t match design spec
* Unexpected layout shifts or gaps
* Text overflow, clipping, or truncation
* Visual artifacts, noise, or anomalies
These issues get surfaced as **Visual Issue events**, which you can filter and inspect alongside normal session data.
### How to Use
You need to have the **Session Replay** product enabled to be able to enable the AI Visual Issues feature. Once the feature is enabled, you follow these steps:
#### Step-by-Step
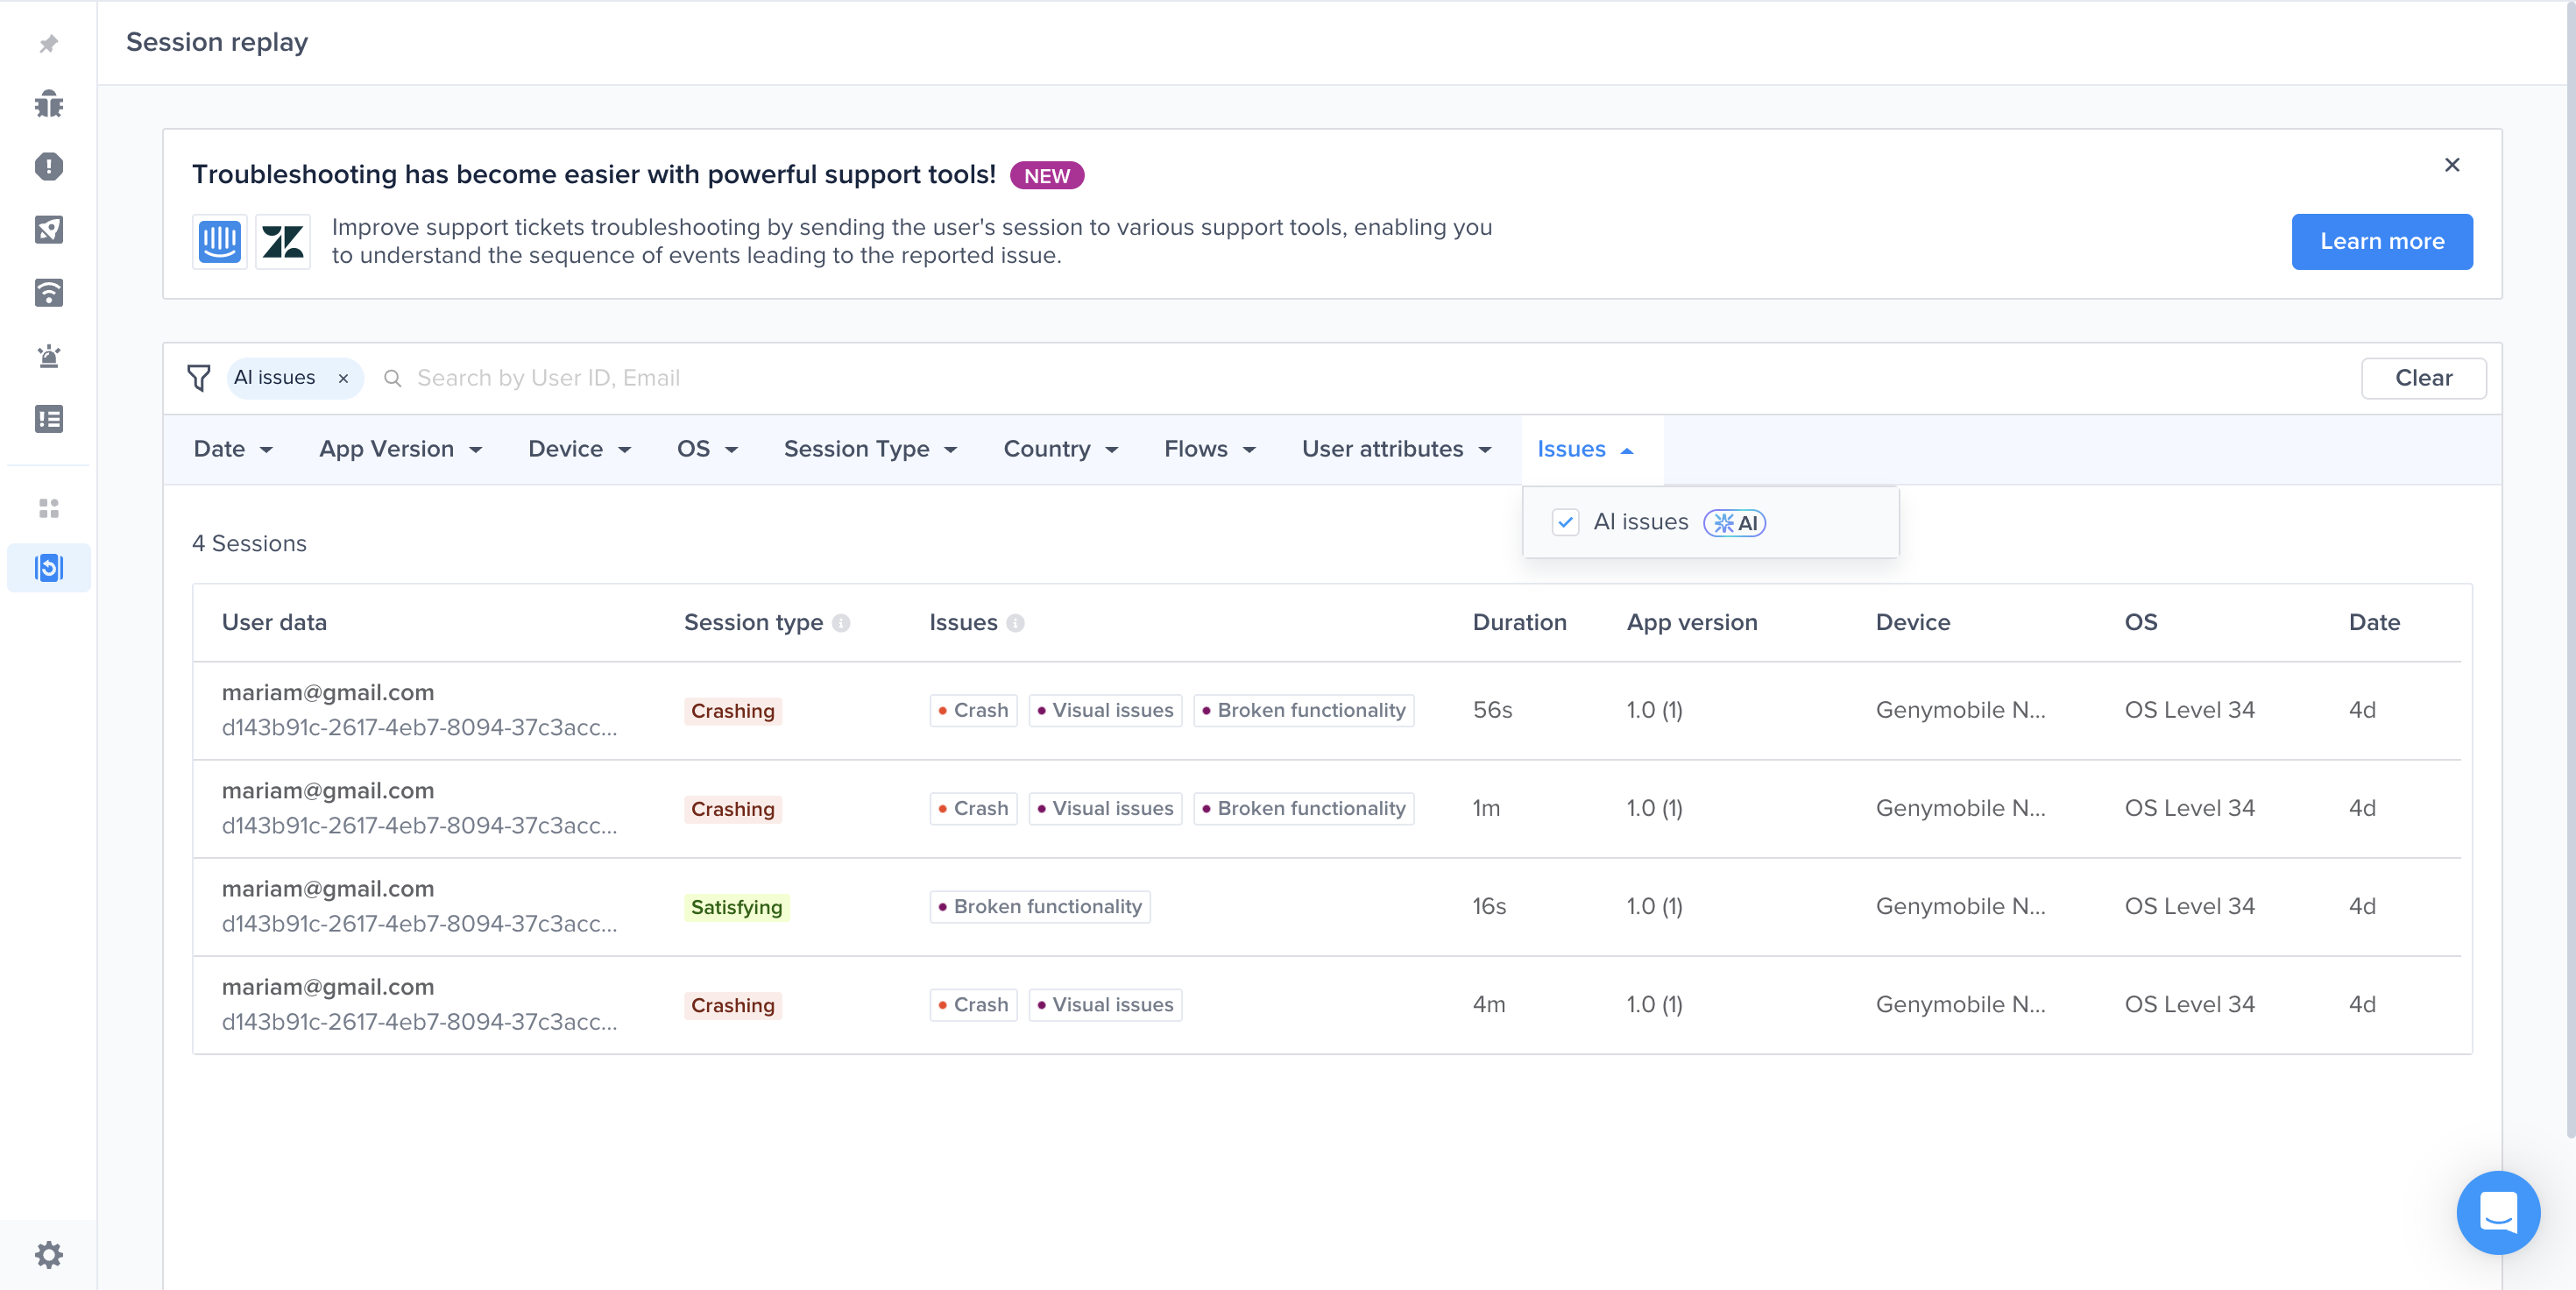
1. On the Session Replay list, use the new “AI Issues” filter to only show sessions flagged with AI issues including visual issues.
2. Open a session with flagged issues. Two ways to navigate:
* Scroll through the event timeline to find the visual issue event.
* Click the purple dot on the timeline to jump directly to the issue’s screenshot view.
* Use the new AI issues filter, you can select “Visual Issues”
3. Viewing a Visual Issue event shows:
* The exact screenshot where the issue was detected
* A descriptive summary of the issue (e.g. “element misaligned by 4px”)
### Grouping
Visual issues that describe the same underlying defect are collected into a single group. A problem that shows up across many sessions appears once, with a count, instead of as a long run of near-identical entries.
#### What gets grouped
A new visual issue is compared against the representative issue of each existing group, based on what the issue actually describes: the defect itself, its likely root cause, and the flow the user was in when it was captured. A close enough match joins that group. Anything else stays on its own as a single issue.
#### What you see
* On the AI Issues page, a group appears as one row carrying its shared description and the number of occurrences it holds. A visual issue that hasn't matched anything shows as **Single**.
* Sort by occurrences to bring the most widespread issues to the top.
* Open a group's occurrences drawer to see every occurrence it holds, then open any one of them for the exact screenshot and the session it came from. This is how you check what went wrong for one specific user without losing the grouped view.
* Visual issues also appear in the [Issues List](/product-guides-and-integrations/product-guides/inbox/issues-list.md) on the Inbox page, where the row's **Type** reads either **Single** or **Group** with its occurrence count.
#### Ungrouping
If an occurrence doesn't belong in a group, select it in the occurrences drawer and choose **Ungroup**. You'll be asked why before the change is applied, with two options: **Issues are unrelated**, or **Duplicate of another group**.
{% hint style="info" %}
The reason you pick is used to improve grouping accuracy over time, so it's worth choosing the one that fits rather than the first one on the list.
{% endhint %}
The first occurrence in a group cannot be ungrouped.
### Feedback
Every visual issue can be marked valid or not valid, and that feedback feeds back into detection accuracy.
* **Valid.** Marking an issue as valid gives you a **Report bug** link to turn the detection into a bug report, or **View bug** if a report already exists for it.
* **Not valid.** Marking an issue as not valid opens a short form: pick a reason (**Behavior was expected**, **User aborted the flow**, or **Evidence doesn't support it**), optionally add a comment, and submit. You then get a **Hide issue** link to take it off your list.
Feedback controls are available to members with permission to manage Detect Agent.
### How It Works
* No instrumentation changes required - once enabled, existing session screenshots are routed to the visual analysis pipeline.
* Screenshots are passed through an AI model for analysis.
* When anomalies are detected, a Visual Issue event is emitted in the timeline at the same timestamp as the screenshot.
* The event payload includes descriptive text of the anomaly
* On the front end, UI surfaces let you filter and inspect these events alongside other session data.
### Compatibility & Requirements
* Supported Platforms: All mobile platforms currently supported by Luciq (iOS, Android, React Native, etc.)
* Prerequisite: Session Replay must be enabled
* No SDK version upgrade needed (feature is server-side)
### Limits & Quotas
* Per-account monthly cap: Up to **1,000 analyzed sessions**
* Maximum visual issues generated per month: 1,000
### Getting Access
* Beta / Invite-only: At present, the feature is available by invitation only.
* To request access:
* Submit a request via Intercom / support chat
* If you're an Enterprise customer, reach out to your customer success manager to be added to the waitlist.
* Once approved, the feature will be toggled on from the backend - no SDK changes are needed.
---
# Agent Instructions
This documentation is published with GitBook. GitBook is the documentation platform designed so that both humans and AI agents can read, navigate, and reason over technical content effectively. Learn more at gitbook.com.
## Querying This Documentation
If you need additional information that is not directly available in this page, you can query the documentation dynamically by asking a question.
Perform an HTTP GET request on the current page URL with the `ask` query parameter, and the optional `goal` query parameter:
```
GET https://docs.luciq.ai/product-guides-and-integrations/product-guides/ai-features/detect-agent/visual-issues.md?ask=&goal=
```
`ask` is the immediate question: it should be specific, self-contained, and written in natural language.
`goal` is optional and describes the broader end goal you are ultimately trying to accomplish on behalf of the user. GitBook uses it to tailor the answer towards what is most useful for that goal.
The response will contain a direct answer to the question and relevant excerpts and sources from the documentation.
Use this mechanism when the answer is not explicitly present in the current page, you need clarification or additional context, or you want to retrieve related documentation sections.