> For the complete documentation index, see [llms.txt](https://docs.luciq.ai/llms.txt). Markdown versions of documentation pages are available by appending `.md` to page URLs; this page is available as [Markdown](https://docs.luciq.ai/product-guides-and-integrations/integrations/store-integrations.md).
# Store Integrations
To integrate your App Store or Play Store account, you'll need to navigate to the settings page in the side navigation bar.
Depending on the OS of the current application, you'll find the relevant store integration.
### iOS - App Store
#### Create Integration
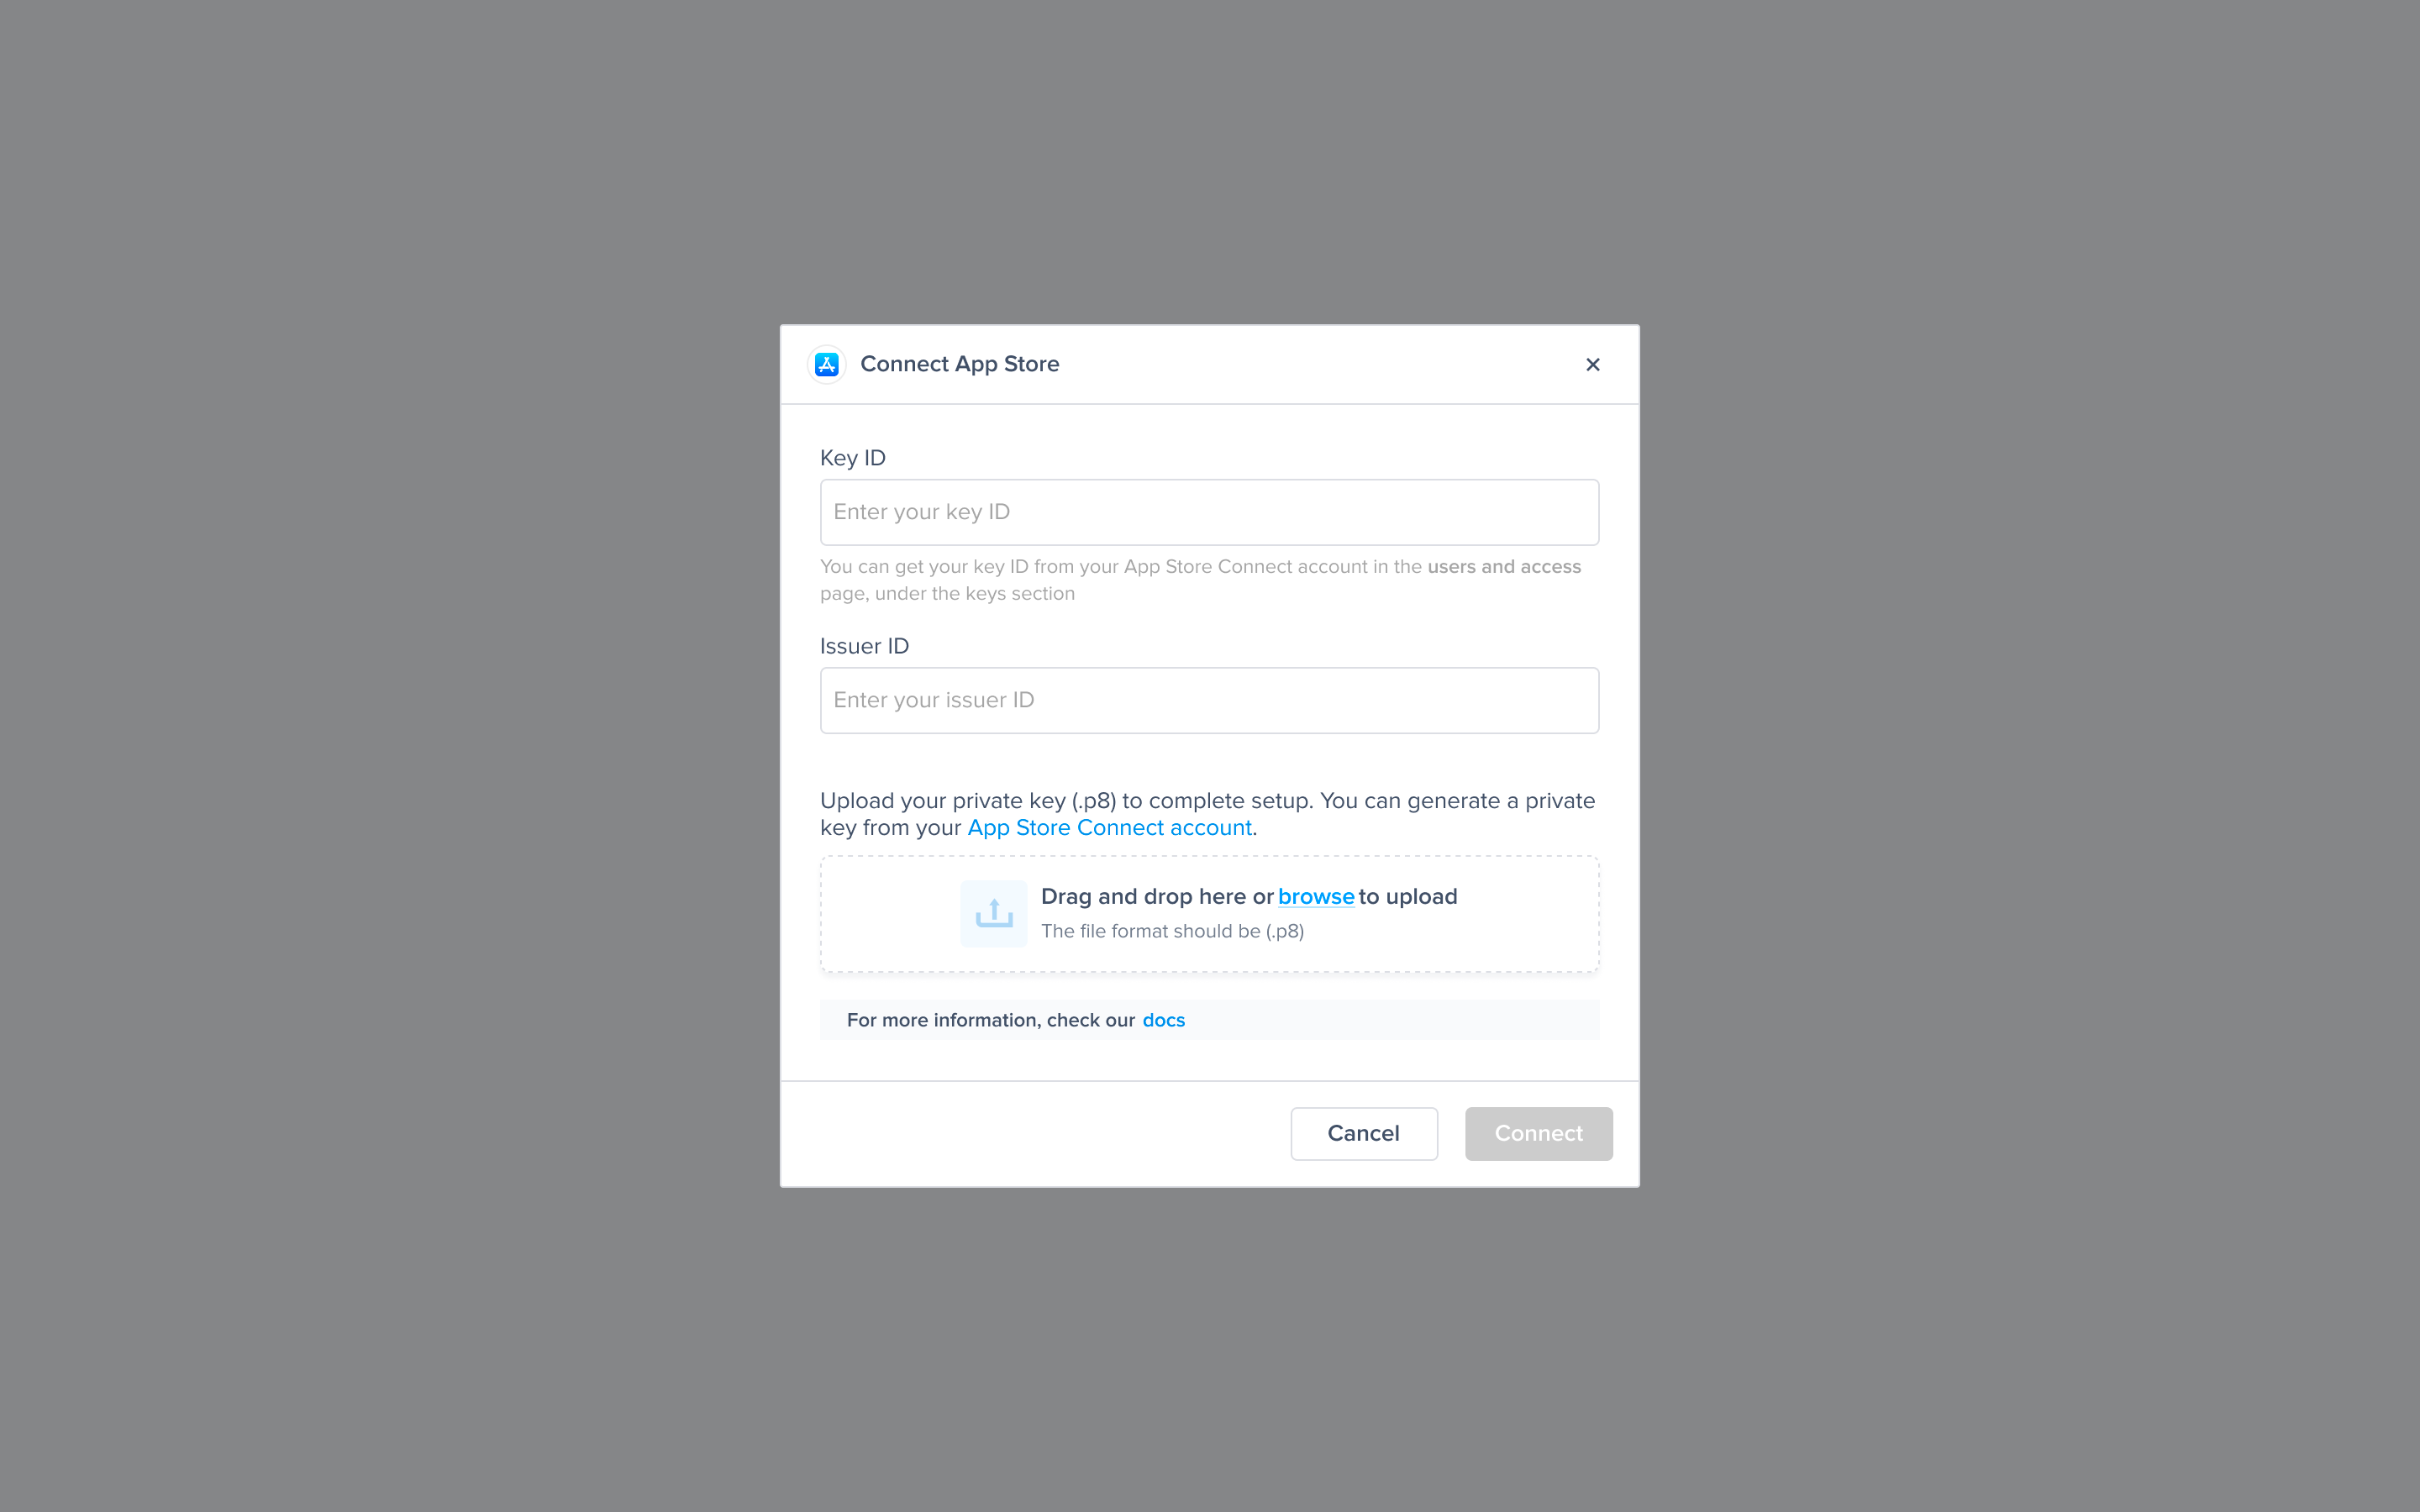
1. To integrate with the App Store, first generate an API Key with “App Manager“ access.\
After generating the key, enter your Key ID and Issuer ID, then upload your .p8 file.
2. **Choose Bundle ID:** We'll fetch all bundle IDs associated with the created Key ID.
3. You now have a successful connection.
#### How to generate an API Key for App Store Connect?
1. Log in to [App Store Connect](https://appstoreconnect.apple.com/).
2. Select Users and Access, and then select the Integrations tab.
3. Click Generate API Key or the Add (+) button.
4. Enter a name for the key. The name is for your reference only and is not part of the key itself.
5. Under Access, select the **App Manager or Admin** role for the key
6. Click Generate.
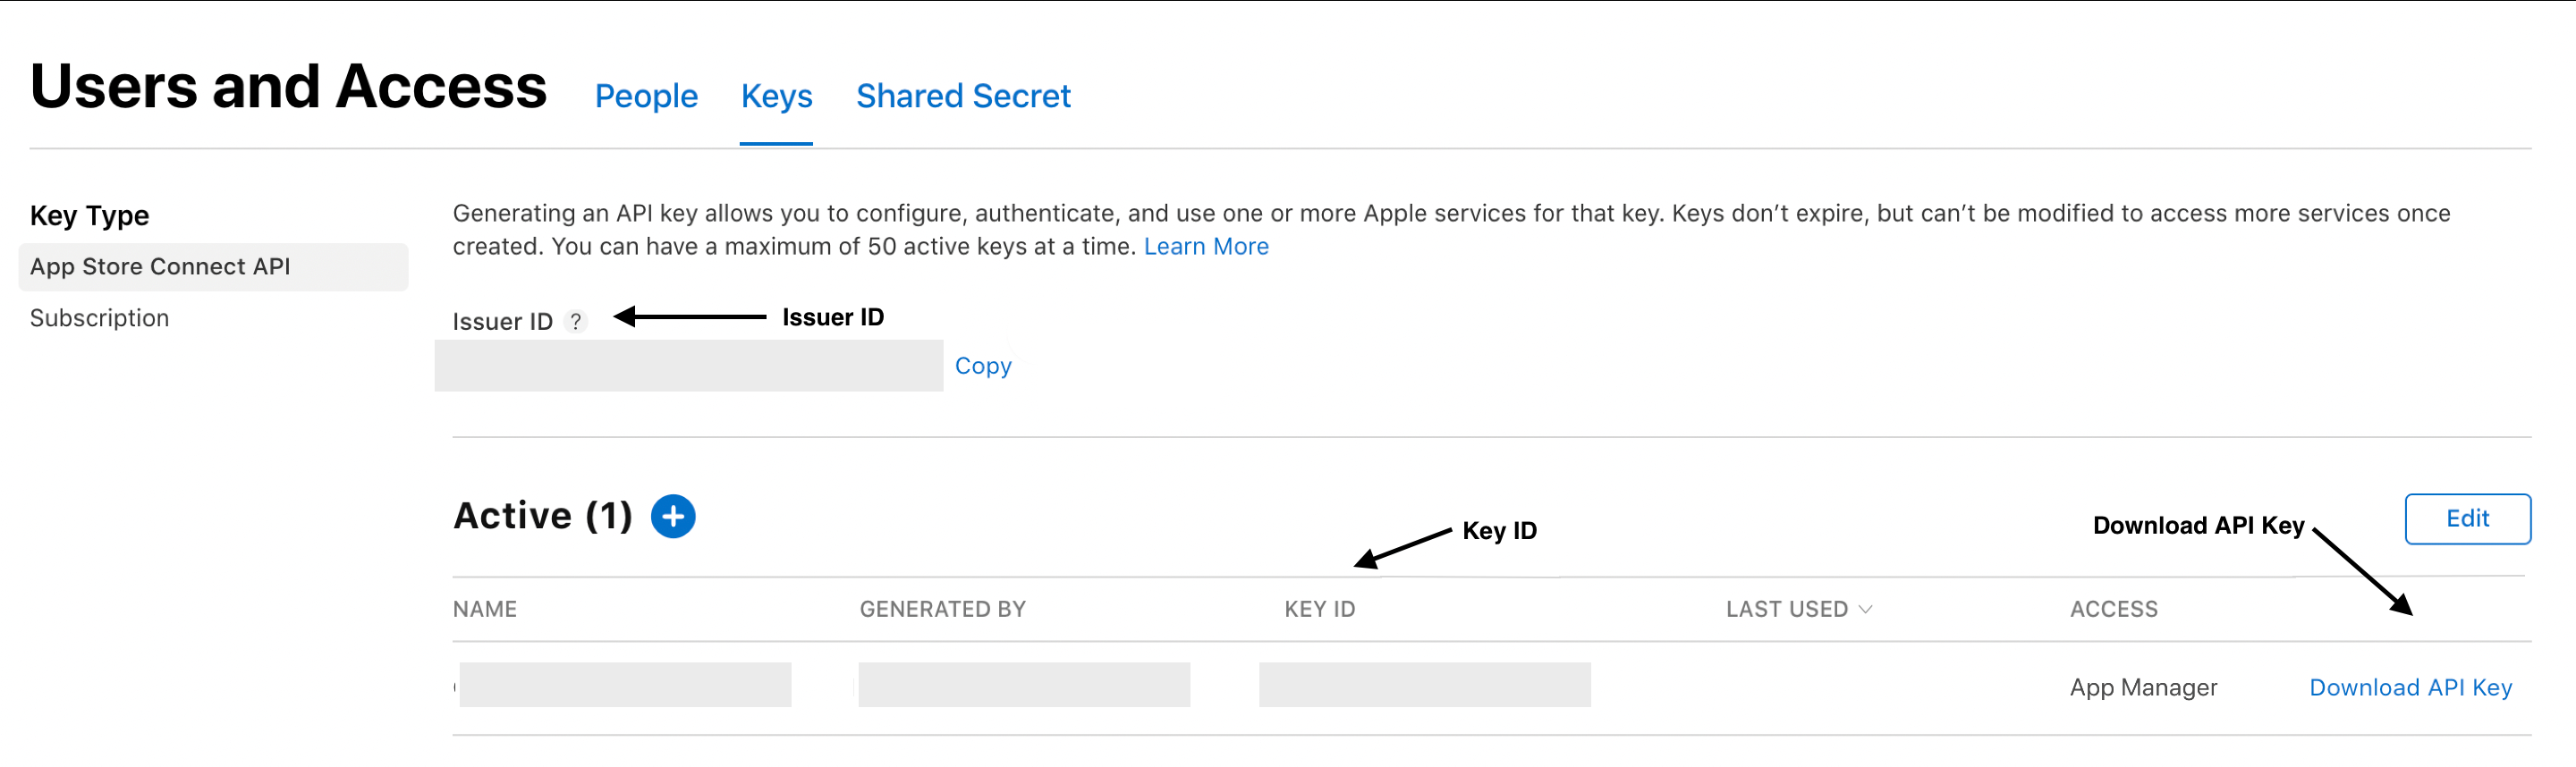
The new key's name, key ID, download link, and other information will appear on the page. The private key is available for download a single time. You can check Apple's documentation for it [here](https://developer.apple.com/documentation/appstoreconnectapi/creating_api_keys_for_app_store_connect_api).
App Store Connect Dashboard
{% hint style="info" %}
**How we prioritize the security of your integration?**
* **API Key Management**: We follow best practices for safeguarding API keys, including secure storage by encrypting your key and only decrypting it at runtime.
* **Data Encryption**: We use industry-standard encryption for data transmitted between Luciq and App Store Connect to keep your information secure during transit.
{% endhint %}
#### Edit Integration
1. After creating the integration successfully, you can edit the integration by choosing another bundle ID associated with the Key ID by clicking on the pencil icon.
2. Choose the new Bundle ID.
{% hint style="warning" %}
You will not be able to edit the key details.
{% endhint %}
#### Delete Integration
You can delete the Bundle ID associated with our dashboard and we won’t be able to fetch any details from the store for this Bundle ID.
{% hint style="warning" %}
Deleting this integration will not delete the key from the dashboard. The key will be permanently deleted once all integrations using this key are deleted.
{% endhint %}
### Android - Google Play
{% hint style="info" %}
**You can refer to Google’s guide on getting started with Google Play Developer** [**API**](https://developers.google.com/android-publisher/getting_started)
{% endhint %}
#### Create Integration
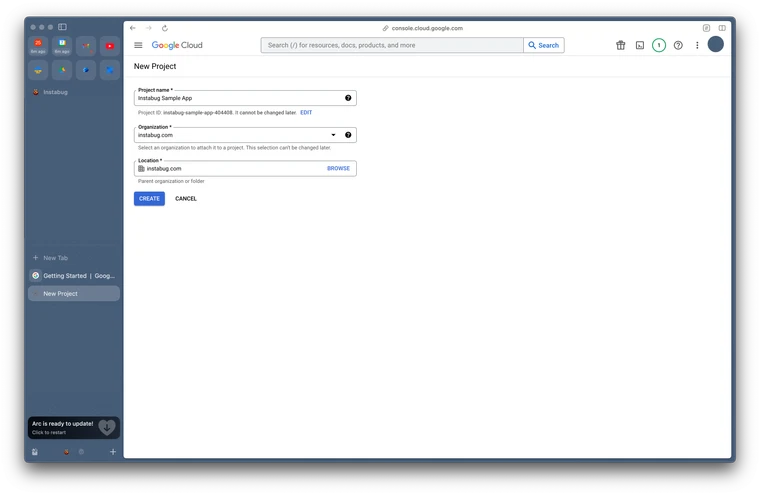
1. **Create a Google Cloud Project**. You can skip this step if you already have a Google Cloud Project you want to use.\
Otherwise, you can create a project in the [Google Cloud Console](https://console.cloud.google.com/projectcreate).
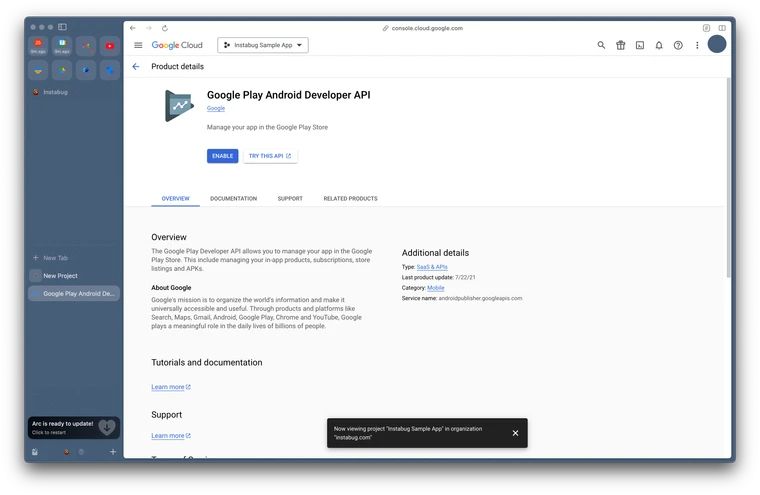
2. **Enable the Google Play Developer API for your Google Cloud Project**
1. Go to the Google Play Developer API [page](https://console.developers.google.com/apis/api/androidpublisher.googleapis.com/) in Google Cloud Console.
2. Click **Enable**
3. **Set up a service account** with appropriate Google Play Console permissions to access the Google Play Developer API. You can create a [service account](https://developers.google.com/accounts/docs/OAuth2ServiceAccount) from the Google Play Console.
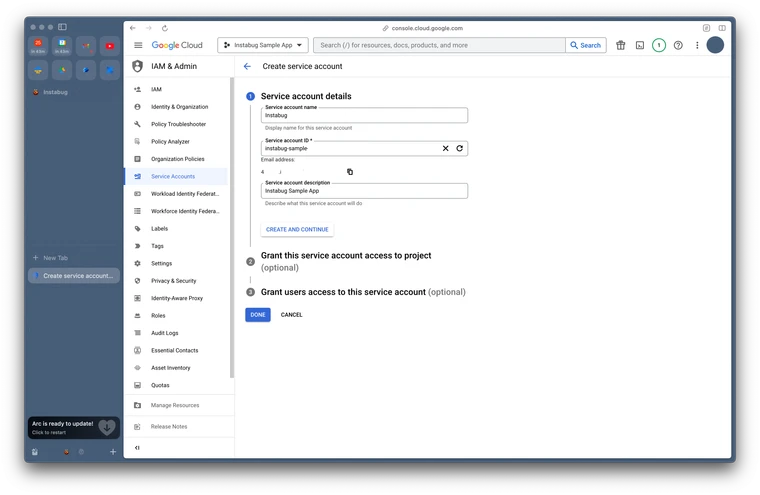
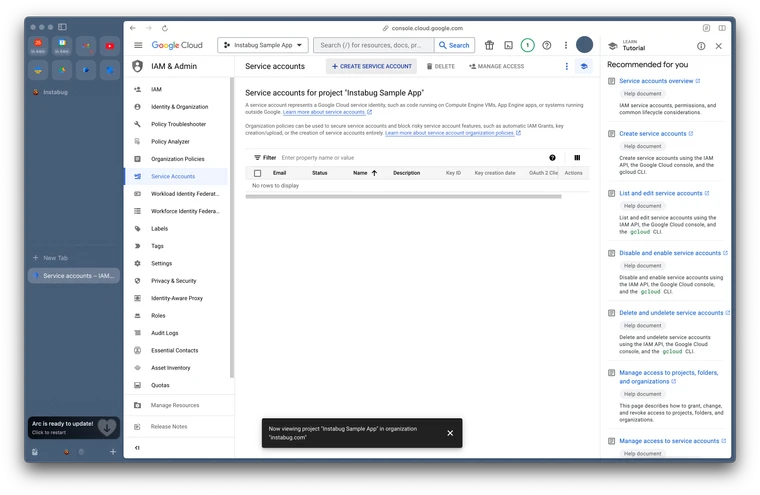
1. In the Google Cloud Console, go to [Service Accounts](https://console.cloud.google.com/iam-admin/serviceaccounts)
2. Click "Create service account" and follow the steps.
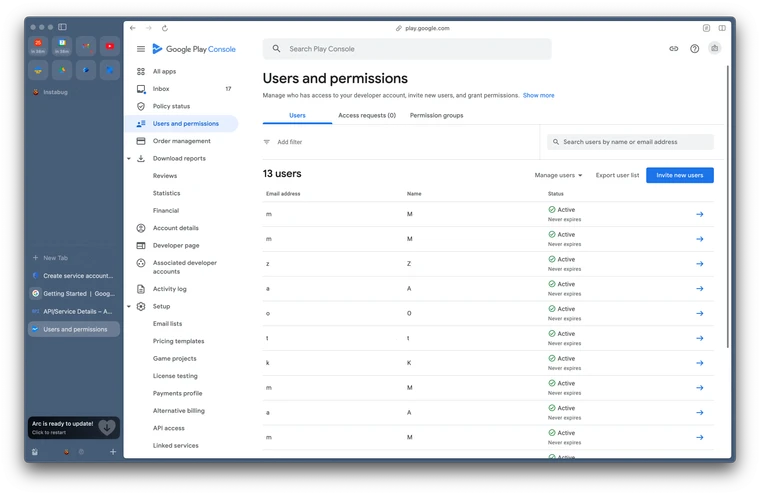
3. Go to the [Users & Permissions](https://play.google.com/console/users-and-permissions) page on the Google Play Console.
4. Click "Invite new users".
5. Put an email address for your service account in the email address field and grant the necessary rights to perform actions.
6. You'll need to allow the Release to production, exclude devices, and use Play App Signing permission to be able to use rollout management .
7. Click "Invite user".
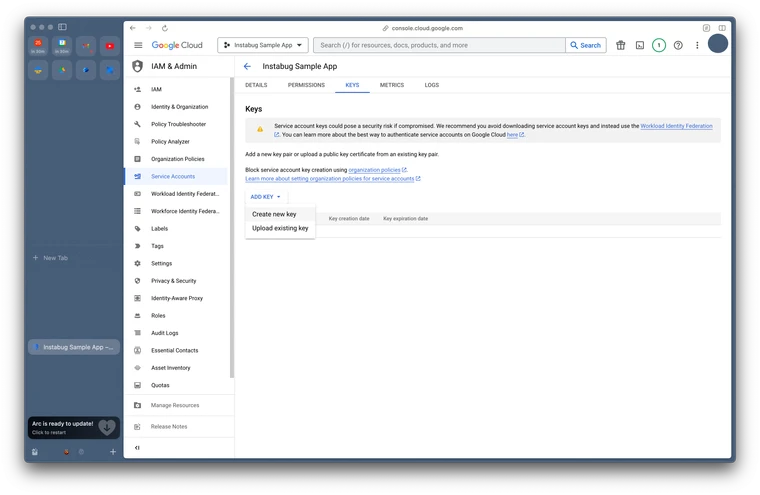
4. **Generate a key**
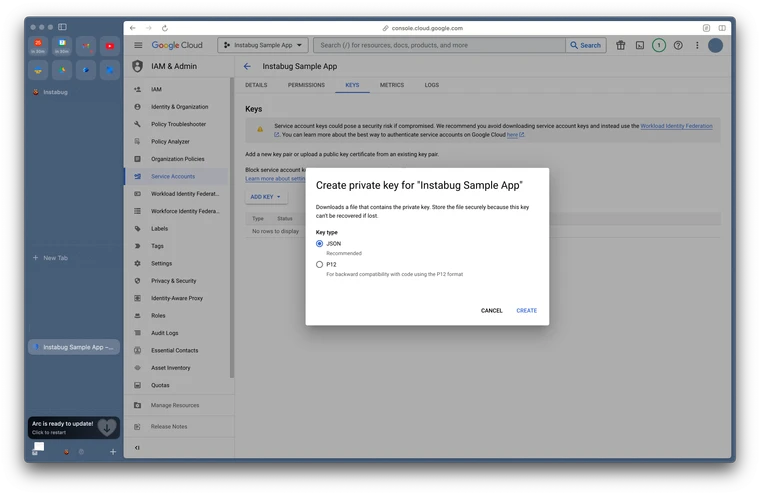
1. **Create a new key**: After you've granted permissions, click on the service account name and then select the "Keys" tab. Click the "Create new key" button.
2. Select "JSON" as the key type and click "Create".
3. Download Service account key file: Your service account key file should start downloading; you’ll need to upload that key on our dashboard.
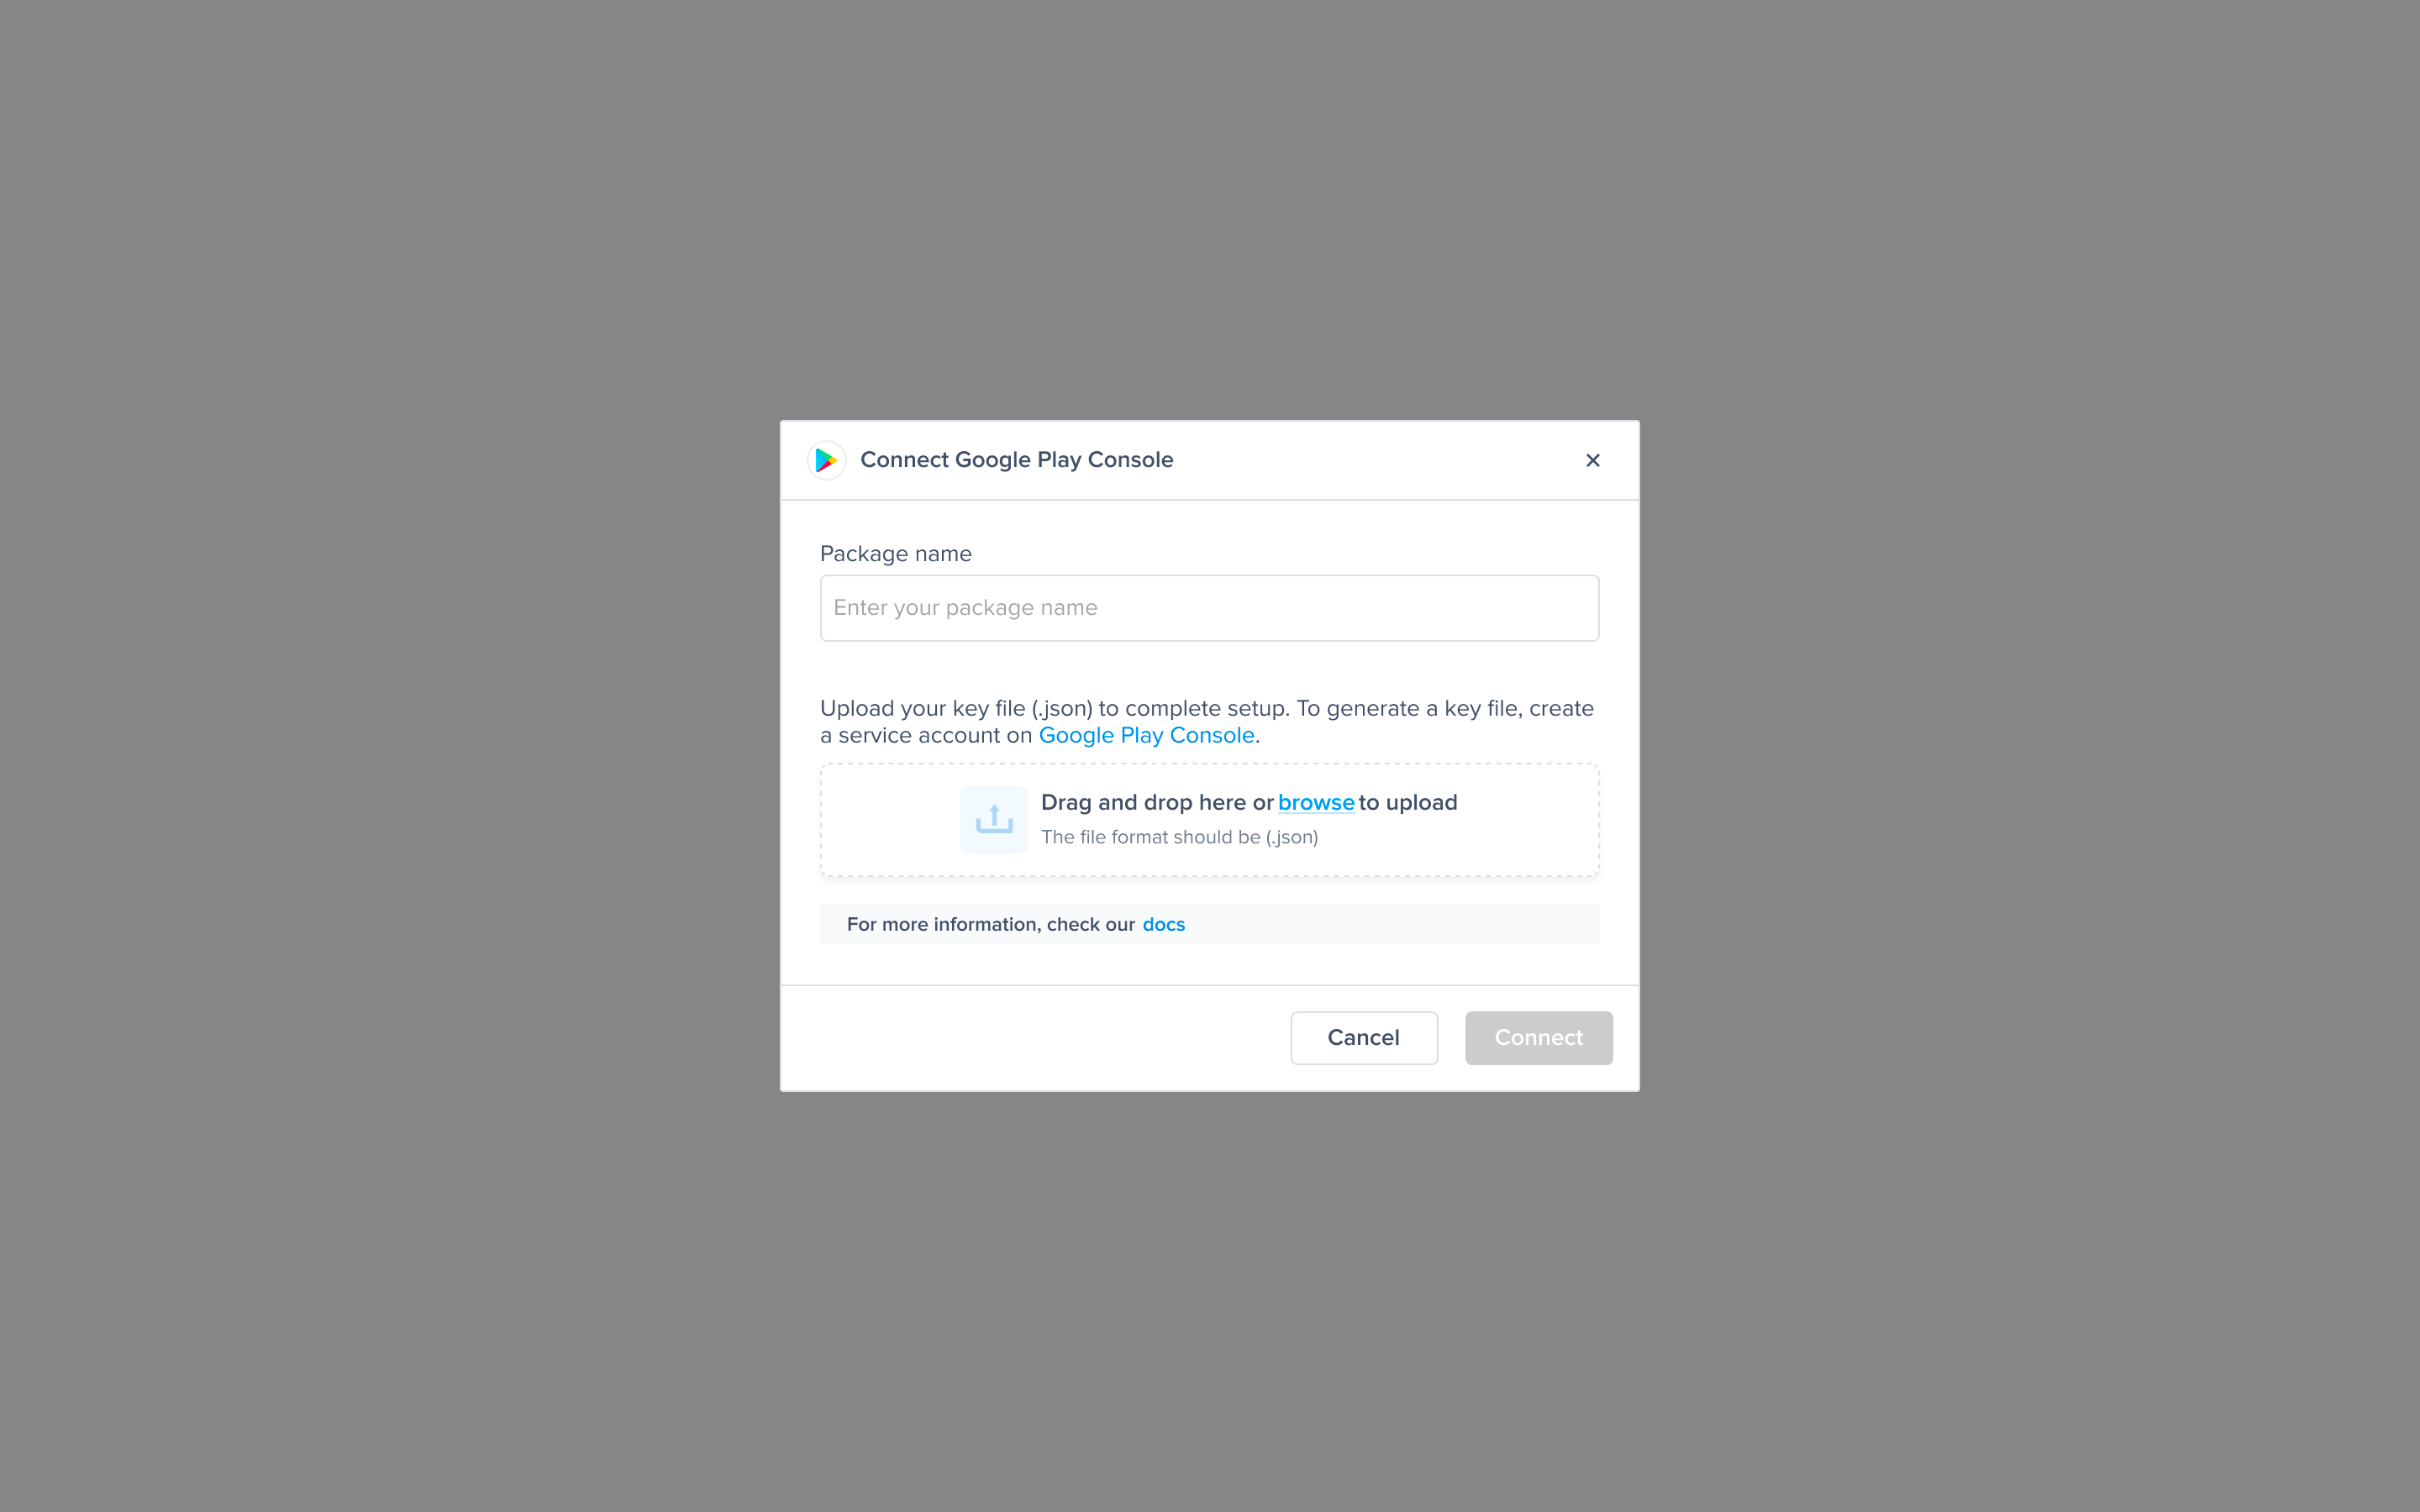
5. **Upload key to Luciq**.
1. To integrate a Play Store account with Luciq, you'll need to navigate to the settings page in the side navigation bar.
2. Click on "Connect app".
3. You’ll need to upload the Package name and Key in the Luciq dashboard.
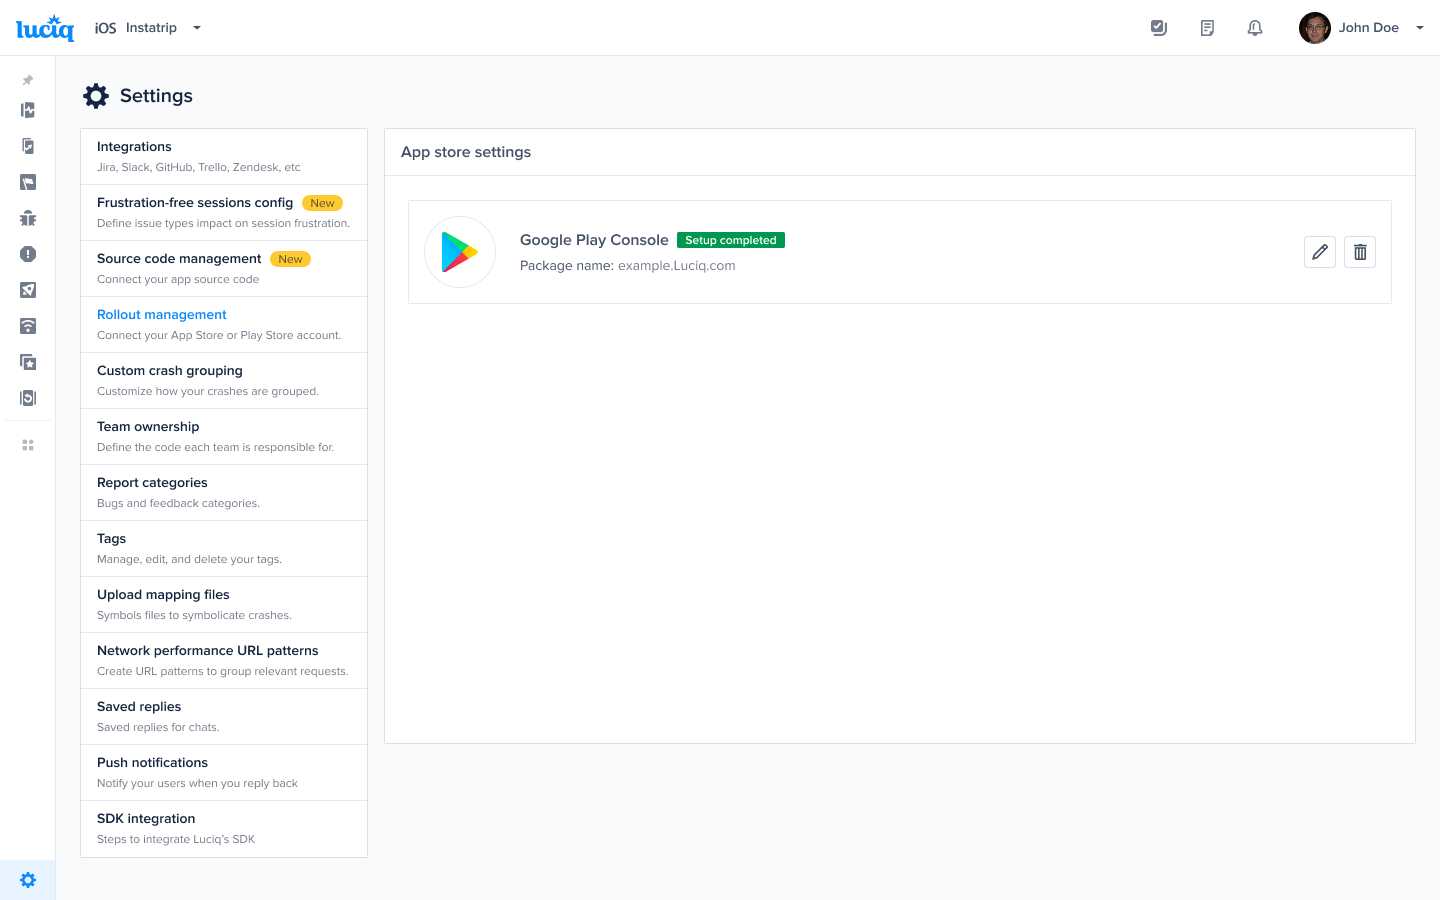
6. Now you have a successful connection!
{% hint style="info" %}
**How we prioritize the security of your integration**
* **API Key Management**: We follow best practices for safeguarding API keys, including secure storage by encrypting your key and only decrypting it at runtime
* **Data Encryption**: We use industry-standard encryption for data transmitted between Luciq and the Play Store Console to keep your information secure during transit.
{% endhint %}
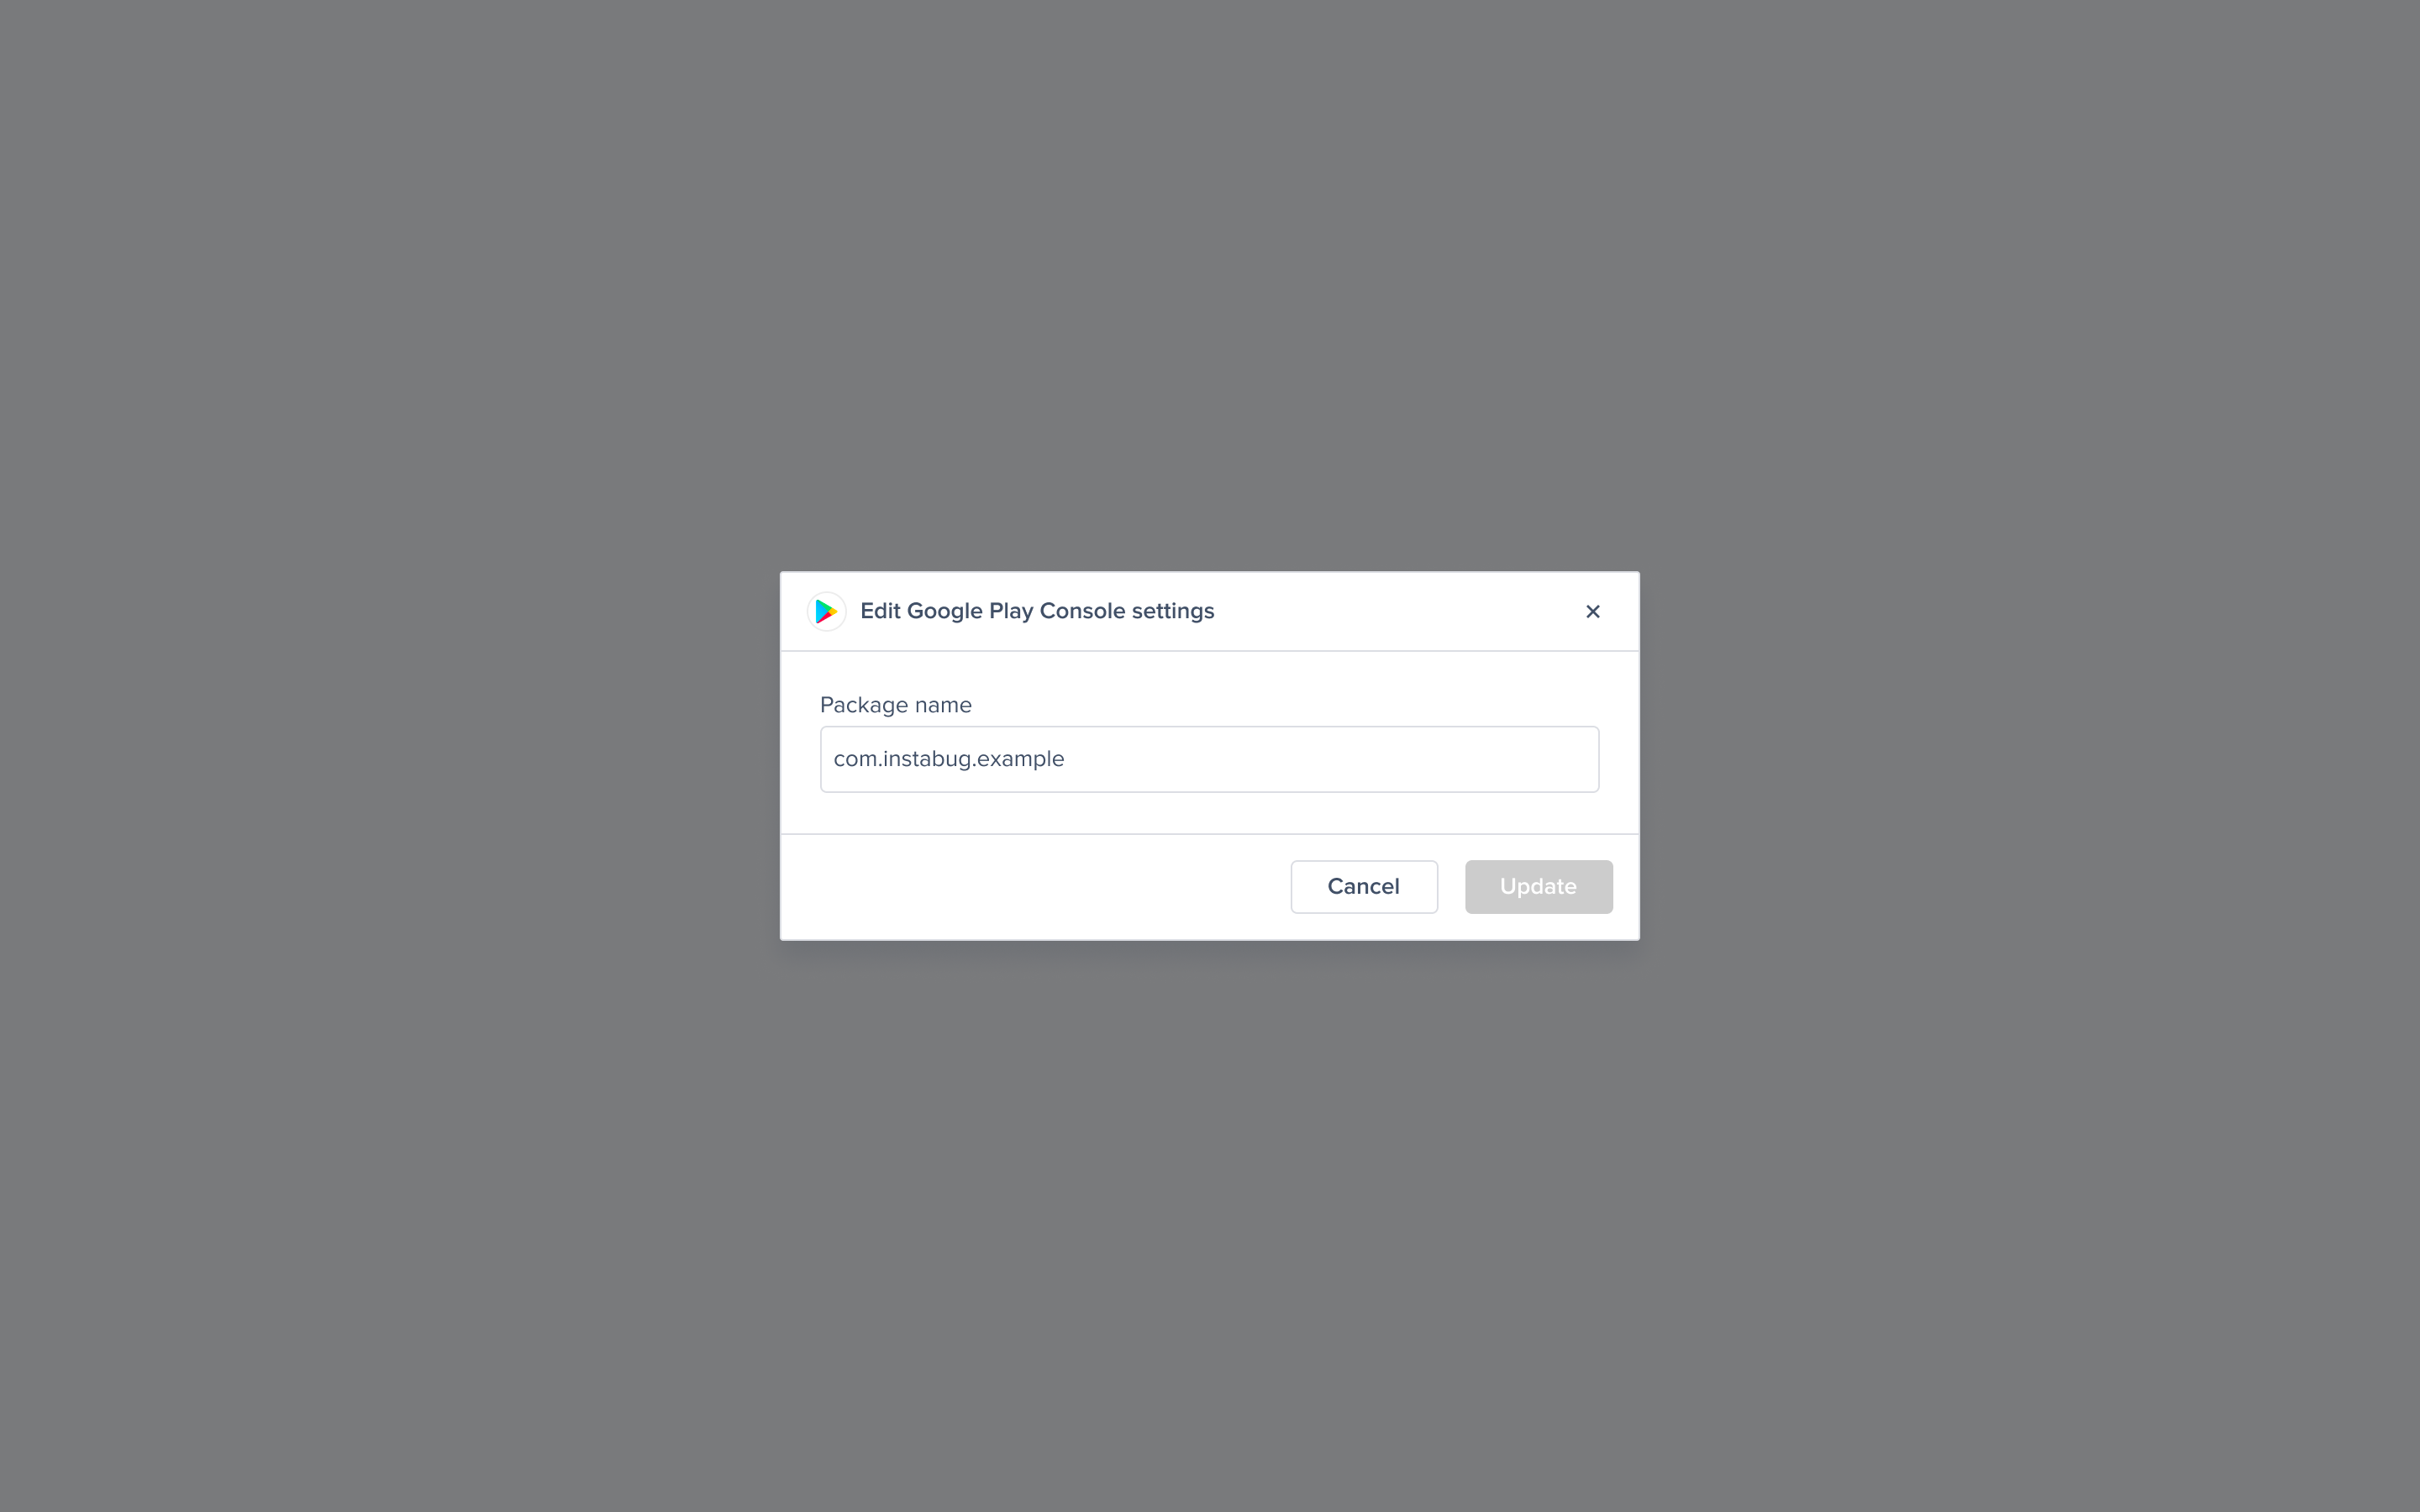
#### Edit Integration
1. After creating the integration successfully, you can edit the integration by entering another package name associated with the Key ID by clicking on the pencil icon.
2. Enter the other package name.
{% hint style="warning" %}
You will not be able to edit the key details.
{% endhint %}
#### Delete Integration
You can also delete the package name associated with the Luciq dashboard, and we won’t be able to fetch any details from the store for this package name.
{% hint style="warning" %}
Deleting this integration will not delete the key from the dashboard. The key will be permanently deleted once all integrations using this key are deleted.
{% endhint %}
---
# Agent Instructions
This documentation is published with GitBook. GitBook is the documentation platform designed so that both humans and AI agents can read, navigate, and reason over technical content effectively. Learn more at gitbook.com.
## Querying This Documentation
If you need additional information that is not directly available in this page, you can query the documentation dynamically by asking a question.
Perform an HTTP GET request on the current page URL with the `ask` query parameter, and the optional `goal` query parameter:
```
GET https://docs.luciq.ai/product-guides-and-integrations/integrations/store-integrations.md?ask=&goal=
```
`ask` is the immediate question: it should be specific, self-contained, and written in natural language.
`goal` is optional and describes the broader end goal you are ultimately trying to accomplish on behalf of the user. GitBook uses it to tailor the answer towards what is most useful for that goal.
The response will contain a direct answer to the question and relevant excerpts and sources from the documentation.
Use this mechanism when the answer is not explicitly present in the current page, you need clarification or additional context, or you want to retrieve related documentation sections.